 carjourney
From the CarJourney journal
How to Troubleshoot a Check Engine Light: A Step-by-Step Guide
Last Updated: November 9, 2026
Quick Summary
Start by checking whether the light is steady or flashing, since a flashing light means stop driving soon. Next, tighten or inspect your gas cap, then read the diagnostic trouble code with an OBD2 scanner to find the likely cause before replacing any parts. A check engine light with smooth running can usually wait a few days for a diagnosis.
- A flashing check engine light usually signals a misfire that can damage the catalytic converter.
- Most cars sold in the United States since 1996 have an OBD-II port under the dashboard.
- Codes starting with P are powertrain faults; the following digits point to the specific problem.
- Write down codes before clearing them, since clearing without a fix only hides the fault until it returns.
- Many national auto parts chains read codes for free, a low-cost first step before paying a shop.
Table of Contents
- What the Check Engine Light Means and How Urgent It Is
- Safety First: Protocols Before You Start Diagnosing
- Step 1: Check the Gas Cap and Simple Causes
- Step 2: Use an OBD2 Scanner for Beginners to Read Codes
- Common Check Engine Light Codes and What They Point To
- Is It Safe to Drive With the Check Engine Light On?
- DIY Diagnosis vs. a Professional: Cost and When to Book a Mechanic
- Your Next Step: Logging the Fix and Clearing the Light
- Frequently Asked Questions
A check engine light can turn a normal drive into a stressful one. This guide walks through how to troubleshoot the light step by step, from a loose gas cap to reading a diagnostic code.
What the Check Engine Light Means and How Urgent It Is
The check engine light is the malfunction indicator lamp (MIL) on your dashboard. It tells you the car's engine control system has detected a problem. The light is part of the emissions and engine diagnostics system, and it is not always a sign of major damage.
Here is the short version: a steady light means the problem is real but usually not an emergency, while a flashing light means act now.
Flashing vs. Solid Light: Why the Difference Matters
A solid light means the system has logged a fault that needs attention soon. A flashing light usually points to an engine misfire serious enough to damage the catalytic converter.
- Solid light: Schedule a diagnosis within a few days.
- Flashing light: Reduce speed, avoid heavy load, and get the car checked as soon as possible.
Watch out: a flashing light combined with rough running, shaking, or a burning smell means stop driving and call for a tow.
Safety First: Protocols Before You Start Diagnosing
Before you touch anything, consider what you decide to do with the car once the light is on. Treat this section as the gate: if any item below fails, stop and reassess before spending money on parts.
Decide first: is the car safe to drive at all?
Before any diagnosis, classify the light and the car's behavior together. A steady light with smooth running, normal temperature, and normal power is a "diagnose soon" situation. A flashing light is a "limit driving now" situation, because a flashing MIL usually indicates an active misfire that dumps unburned fuel into the exhaust, where it can overheat and damage the catalytic converter.
- Flashing light, smooth running: drive only to the nearest safe stop; do not continue a commute or a road trip.
- Flashing light plus rough running, shaking, loss of power, or a burning/sulfur smell: pull over safely and arrange a tow. Do not "see if it clears."
- Steady light plus overheating, smoke, or a brake/steering warning also lit: stop driving; multiple warnings together change the risk profile.
Watch out: a flashing light that "goes away" after you let the car sit is not fixed, the underlying misfire is still logged and will return, often worse under load.
Electrical and scan-tool safety
Plugging a scanner into the OBD-II port is low-risk, but only if you follow the port's own rules. The port is live whenever the battery is connected, so a bent pin or a cheap cable that shorts can blow the fuse that feeds the port, and on many vehicles that same circuit powers other cabin electronics.
- Turn the ignition to the "on" position (engine off) when plugging in or removing a scan tool unless the tool's instructions say otherwise. Never plug in or unplug a scanner while cranking the engine.
- Inspect the port and connector for bent pins, corrosion, or a loose fit before forcing anything in.
- Do not leave a Bluetooth or Wi-Fi dongle plugged in permanently on a car that sits for long periods; some dongles draw a small parasitic load and can contribute to a no-start.
Physical safety under the hood
- Work on a level, paved surface with the parking brake set and the transmission in Park (or in gear with the wheels chocked on a manual).
- Use jack stands rated for the vehicle's weight; never rely on a jack alone, and never put any part of your body under a car supported only by a jack.
- Let the engine cool completely before touching the exhaust manifold, catalytic converter, or any sensor near them, surface temperatures there can exceed 1,000°F in normal operation.
Battery and electrical baseline before you trust any code
A weak battery or a poor ground connection is a well-known cause of phantom codes and of modules that report faults that are not real. Before you chase a code, check the battery terminals for corrosion and tightness, confirm the battery is not more than a few years old, and make sure the charging system is behaving, some auto parts stores may offer battery and charging-system testing; ask before you go.
Step 1: Check the Gas Cap and Simple Causes
Start with the cheapest fix. A loose or worn gas cap can break the fuel system seal and trigger the light. Remove the cap, inspect the rubber gasket for cracks, then tighten it until it clicks.
Other simple causes include a dirty or failing mass airflow sensor and a worn spark plug. A common mistake is replacing expensive parts before checking the basics.
Step 2: Use an OBD2 Scanner for Beginners to Read Codes
An OBD2 scanner is the most useful tool for this job. Most cars sold in the United States since 1996 have an OBD-II port, usually under the dashboard near the steering column.
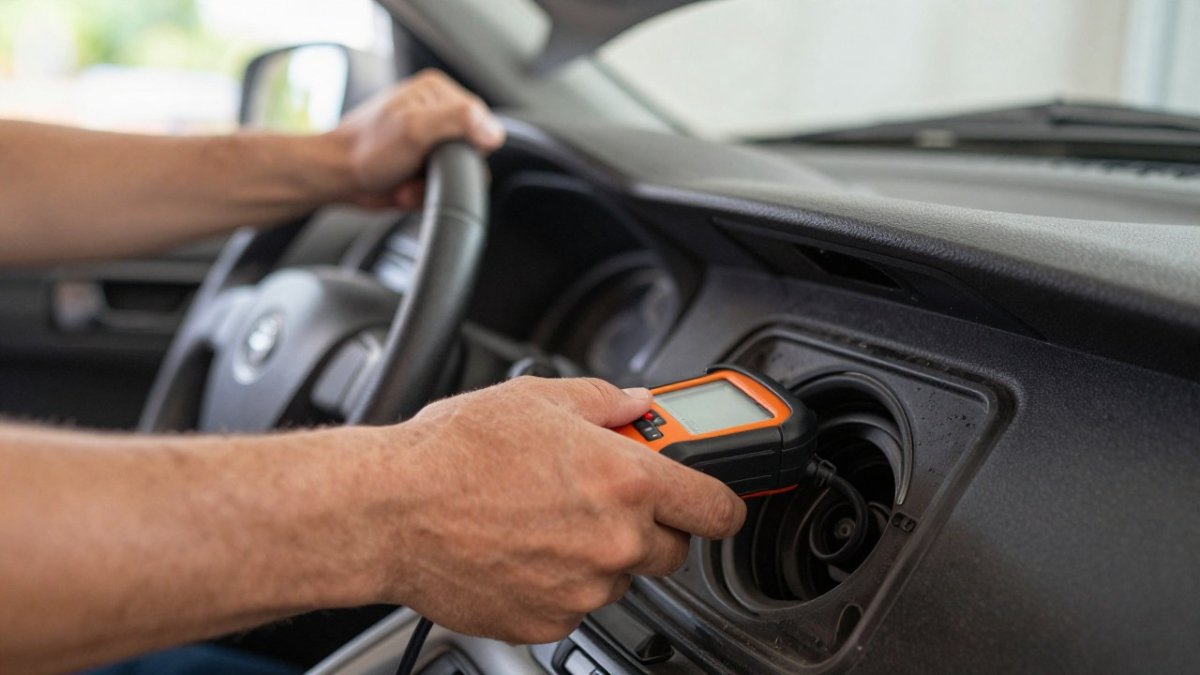
A basic handheld reader works well for many owners. Choose one that shows live data and can clear codes, and look for a model that supports the car's make and year.
Interpreting Diagnostic Trouble Codes (DTCs)
Each code starts with a letter that identifies the system: P for powertrain, B for body, C for chassis, and U for network. The next digits point to the specific fault. A code like P0301 means cylinder 1 misfire.
Treat a code as a clue, not a verdict. The same code can have several causes, so check related sensors and wiring before buying parts.
Common Check Engine Light Codes and What They Point To
Some codes show up far more often than others. These are common examples:
- P0420: Catalytic converter efficiency below threshold.
- P0171: System too lean, often a vacuum leak or dirty airflow sensor.
- P0455: Large evaporative emission leak, frequently a gas cap issue.
Write down the codes before clearing them. Clearing codes without fixing the cause only turns the light off until the fault returns.
Some codes show up far more often than others, and each one points to a different area of the engine.
| Code | Points to | Note |
|---|---|---|
| P0420 | Catalytic converter efficiency below threshold | Common code to read first |
| P0171 | System too lean | Often a vacuum leak or dirty airflow sensor |
| P0455 | Large evaporative emission leak | Frequently a gas cap issue |
| P0300 | Random misfire across multiple cylinders | Check related sensors and wiring first |
Is It Safe to Drive With the Check Engine Light On?
With a solid light and smooth running, you can usually drive short distances to a shop. Keep trips short, avoid highway speeds, and watch the temperature gauge.
Do not keep driving if the light flashes, the engine runs rough, power drops sharply, or you see smoke. Those signs point to damage that gets more expensive every mile.
DIY Diagnosis vs. a Professional: Cost and When to Book a Mechanic
The honest answer is that the right call depends on the code, your tools, and how much of your own time you value. A framework beats a slogan here, because "always DIY" and "always see a mechanic" are both wrong for a meaningful share of check-engine cases. That same judgment starts with distinguishing a check-engine warning from other dashboard signals, since each calls for a different response; IDHAutos helps put that broader warning-light context in view.
The free option most owners skip
Before buying anything, know that most national auto parts chains will read your codes at no charge in the parking lot, and many will also test your battery, alternator, and starter for free. That is the lowest-cost first step and it tells you whether you are facing a $20 fix or a four-figure repair. Bring the printed or photographed codes with you, the counter staff can often point you to the likely part, though their read is a starting point, not a diagnosis.
When buying a scanner pays for itself
A basic handheld code reader is inexpensive enough that it can pay for itself after one or two avoided diagnostic fees, and a mid-tier tool with live data and the ability to clear codes costs more but earns its keep if you own the car for years or maintain more than one vehicle. The math is simple: if a shop charges a diagnostic fee each time the light comes on, and you expect the light to come on more than once over your ownership, the scanner is usually the cheaper path, provided you actually use the live data rather than just reading and clearing codes.
- Buy a basic reader if: you want to know the code before you call a shop, you own one older vehicle, and you are comfortable with simple sensor and gas-cap fixes.
- Buy a mid-tier tool with live data if: you plan to diagnose drivability issues yourself, you own multiple vehicles, or you want to verify a repair before the light returns.
- Skip the purchase if: the light is flashing, the car is running badly, or the code points to internal engine, transmission, or fuel-system work, the tool will not help you fix those, and the diagnostic fee is money well spent.
Watch out: clearing a code to "see if it comes back" before you have addressed the cause can erase freeze-frame data a professional would use to diagnose the fault, and on some vehicles it resets emissions readiness monitors that then take many drive cycles to complete, which can fail an emissions inspection in the meantime.
When a professional is the cheaper choice
Book a shop when any of the following is true, because the DIY path is likely to cost more in parts, time, or risk than the diagnostic fee:
- The light is flashing, or the engine runs rough, knocks, or loses power.
- The code points to the fuel system, transmission, internal engine components, or a safety system (airbag, ABS, stability control).
- You have replaced an obvious part and the same code returns, that pattern usually means the real cause is upstream (wiring, a connector, a ground, or a sensor the code does not name).
What to ask before you authorize work
Ask for the diagnostic fee in writing, ask whether it is applied to the repair if you proceed, and ask for the specific code and the test that confirmed the failed part, not just the part name. A shop that will not share the code or the test result is a shop to walk away from. Get the estimate in writing before any work begins, and keep the invoice with the codes and mileage so your maintenance log stays complete.
Your Next Step: Logging the Fix and Clearing the Light
After the repair, clear the code with your scanner and confirm the light stays off after a few drive cycles. Then record the date, mileage, code, and fix in your maintenance log.
A written record helps you spot patterns, such as a sensor that fails every few years. It also gives future buyers proof that the problem was handled. CarJourney can keep those logs and reminders organized in one place.
Frequently Asked Questions
Can I diagnose a check engine light myself?
Yes. Many check engine light causes can be found at home with a basic OBD2 scanner, which plugs into the port under the dashboard. The scanner reads the diagnostic trouble code stored by the powertrain control module, which gives you a starting point. Codes alone do not always name the failed part, so use the code to guide further checks such as the gas cap, sensor wiring and vacuum hoses. If the code points to an internal engine or emissions component you cannot test, a shop can confirm the diagnosis.
Is it safe to drive with a check engine light on?
A steady check engine light usually means a non-urgent fault, and you can generally keep driving while you schedule a diagnosis. A flashing light is different. It usually indicates an active engine misfire that can overheat and damage the catalytic converter, so reduce speed and load and get the vehicle checked as soon as possible. Also stop driving if the temperature gauge rises, the engine runs roughly, or you notice a strong smell of fuel.
What is the most common cause of a check engine light?
A loose or damaged gas cap is one of the most common causes, because it lets fuel vapor escape and triggers an evaporative emissions code. Other frequent causes include a failing oxygen sensor, a faulty mass airflow sensor, worn spark plugs or ignition coils, and vacuum leaks. Start with the gas cap, since it is free to check, and then follow the trouble code to the most likely component.
Why is my check engine light on but everything seems fine?
The light can stay on for faults that do not yet affect how the car drives, such as a sensor reading slightly outside its expected range or an emissions monitor that failed a self-test. The vehicle's computer stores the fault as a diagnostic trouble code even when performance seems normal. Read the code with an OBD2 scanner to find out what triggered it. A minor issue can still become a larger repair if ignored, so it is worth addressing early.
 Add carjourney.io as a preferred source on Google →