 carjourney
From the CarJourney journal
Can You Change Your Own Oil Safely? A 2026 Guide
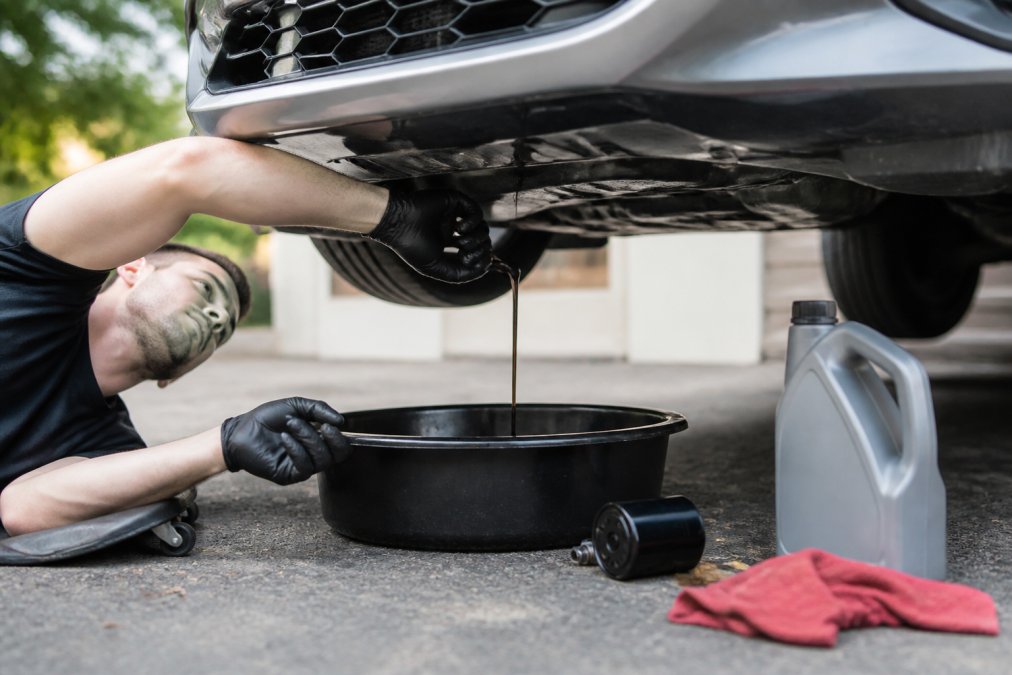
Table of Contents
- Can You Change Your Own Oil Safely? The Short Answer
- Essential Tools for DIY Oil Change
- Step-by-Step Procedure for Changing Your Oil
- How to Dispose of Used Motor Oil Responsibly
- Common Mistakes That Compromise Safety
- How to Read Car Dashboard Warning Lights
- DIY vs. Professional Oil Changes: Weighing the Risks
- Conclusion: Making the Right Choice for Your Vehicle
Last Updated: August 30, 2026
Can You Change Your Own Oil Safely? The Short Answer
Yes, you can change your own oil safely with proper preparation, the right tools, and strict adherence to safety protocols. According to Eddie In Service research on DIY car maintenance dangers, approximately 4,822 people in the U.S. are rushed to emergency rooms annually with injuries from car jack malfunctions, some resulting in amputations. This underscores why changing your own oil safely demands respect for the mechanics involved.
At CarJourney, owners who document their oil changes meticulously maintain better vehicle health and retain higher resale value. Vehicle repair costs have increased 28% over the past three years, which explains why 29% of consumers have switched to DIY oil changes to manage expenses. This guide walks you through everything needed to change your own oil safely, from essential tools to disposal requirements.
Essential Tools for DIY Oil Change
Attempting an oil change without the right tools is how accidents happen. You'll need specific equipment to safely lift your vehicle, drain old oil, replace the filter, and add new oil without injury.
Safety Equipment You Cannot Skip
Before getting under your vehicle, assemble your safety gear. You'll need safety goggles to protect your eyes from hot oil splatter, nitrile gloves rated for oil and chemical resistance, and a respirator or dust mask to prevent fume inhalation. Long sleeves and pants protect your skin from hot oil burns and sharp edges.
The most critical safety equipment is what keeps your vehicle elevated: jack stands and wheel chocks. Never work under a vehicle supported only by a jack. Always use a pair of jack stands rated for your vehicle's weight, placed on solid, level ground. Wheel chocks prevent the vehicle from rolling. A proper setup means the vehicle is supported by jack stands while the floor jack remains engaged as backup.
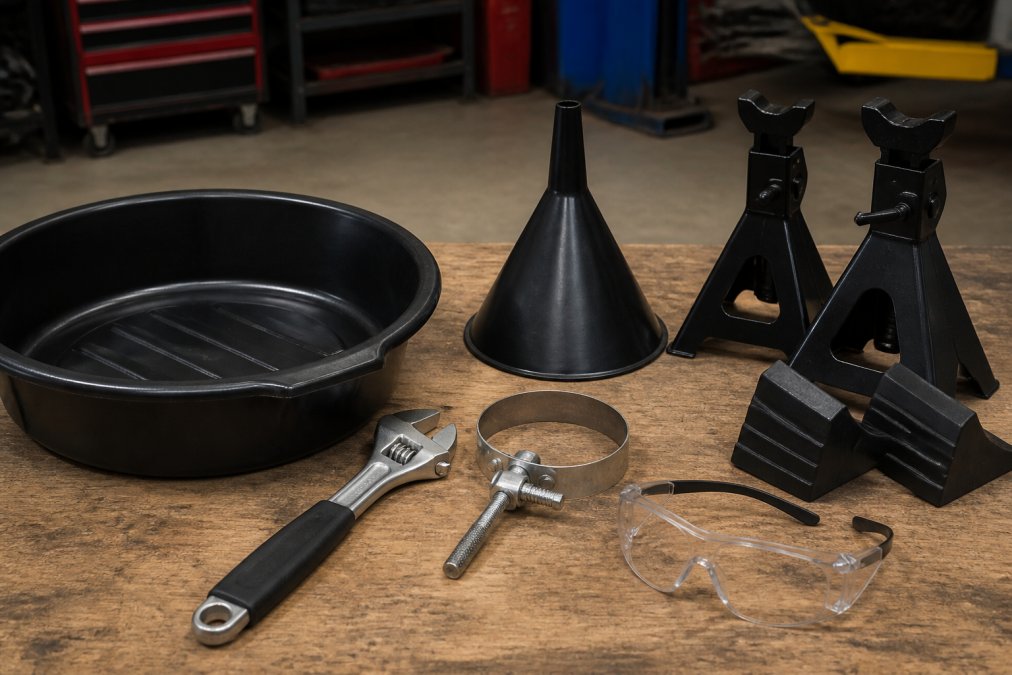
Beyond safety gear, you'll need basic tools: an adjustable wrench or socket wrench for the drain plug, an oil filter wrench sized for your vehicle's filter, a drain pan, and a funnel. Many people also use ramps instead of a floor jack and stands; ramps are safer for beginners because they distribute weight across a larger surface area.
Watch Out Working under a vehicle supported only by a jack is the leading cause of crushing injuries in DIY car maintenance. Use jack stands or ramps every single time. No exceptions.Step-by-Step Procedure for Changing Your Oil
The actual process follows a logical sequence. Rushing any step increases risk and reduces work quality.
Before You Start: Preparation and Safety Checks
Park on a flat, level surface and engage the parking brake firmly. Place wheel chocks behind the rear wheels. If using a floor jack and stands, position them according to your vehicle's manual, never guess where the lift points are. Warm your engine briefly by running it for 2-3 minutes, then turn it off. Warm oil flows more easily than cold oil, but wait 5-10 minutes for it to cool slightly so you can handle components safely.
Locate your oil drain plug, oil filter, and fill cap by consulting your owner's manual. Gather all tools and materials within arm's reach before starting.
Draining Old Oil and Replacing the Filter
Position your drain pan directly under the drain plug. Using your wrench, loosen the drain plug by turning it counterclockwise, then carefully unscrew it by hand. Allow the oil to drain completely, which takes 5-10 minutes.
While draining, locate the oil filter. Using your oil filter wrench, turn the filter counterclockwise to remove it. Before installing the new filter, apply a thin layer of fresh oil to the rubber gasket on the filter's top. Screw the new filter on by hand until the gasket contacts the engine, then turn an additional three-quarters of a turn. Don't over-tighten.
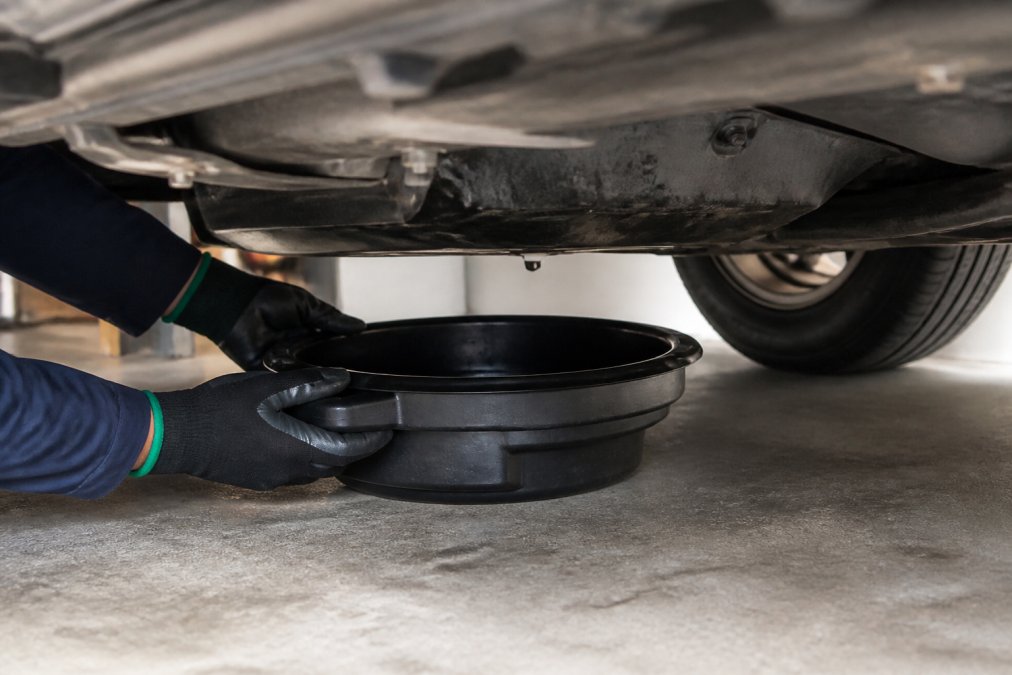
Inspect the drain plug's crush washer. If it's cracked or deformed, replace it. Reinstall the drain plug, tightening it snugly by hand, then using your wrench to secure it fully. Consult your manual for the correct torque specification. genuine car maintenance.
Pro Tip [The most common](/blog/what-happens-if-you-skip-oil-changes) DIY oil change mistake is wrong viscosity oil. Check your owner's manual for the exact specification (e.g., 5W-30, 10W-40). Using the wrong viscosity affects engine wear and fuel economy. Your manual is the only reliable source.Adding New Oil and Verification
Locate the oil fill cap on top of the engine and remove it. Place your funnel in the opening and pour the recommended amount of new oil slowly, checking your progress with the dipstick every half-liter. Fill to the maximum line.
Start the engine and let it run for 30 seconds to circulate new oil through the engine and fill the filter. Turn off the engine and wait 2-3 minutes. Check the dipstick again; oil level should be at or just below the maximum mark. Reinstall the oil fill cap securely.
Inspect underneath the vehicle for leaks around the drain plug and filter. A few drops are normal immediately after filling; significant dripping indicates a problem.
How to Dispose of Used Motor Oil Responsibly
Used motor oil is hazardous waste. One gallon of improperly disposed used oil can contaminate one million gallons of fresh water, according to Parade Magazine environmental impact research. Dumping it down a drain, into soil, or in the trash is illegal in most jurisdictions and carries fines.
Collect your used oil in a sealed, labeled container. Most auto parts stores accept used oil for free, no purchase necessary. Many municipalities also operate collection events or permanent drop-off locations. Call your local waste management department or search online for "used oil recycling near me." Never mix used oil with other fluids like coolant or transmission fluid.
Common Mistakes That Compromise Safety
Wrong oil viscosity is the most common mistake. Owners pour whatever oil is on sale without checking their manual. The manual specifies the exact viscosity for your engine; follow it precisely.
Over-tightening the drain plug or filter damages threads and gaskets. Hand-tighten first, then use your wrench for a final snug turn. Forgetting the crush washer on the drain plug, or reusing a damaged one, causes slow leaks. Always inspect the washer and replace it if damaged.
Not allowing sufficient drainage time leaves old oil in the pan, which mixes with new oil and contaminates it. Give it the full 10 minutes.
Working under a vehicle supported only by a jack is catastrophic. Use jack stands or ramps every single time without exception.
How to Read Car Dashboard Warning Lights
The oil pressure light, typically a red oil can icon, illuminates when oil pressure drops below safe levels. If it comes on while driving, pull over safely, turn off the engine, and check your oil level with the dipstick. If low, add oil immediately. If the level is normal, the warning indicates a more serious problem; don't drive the vehicle until a mechanic inspects it.
The check engine light can indicate oil-related issues, but it also signals dozens of other problems. Many auto parts stores offer free code reading, which tells you whether the issue is oil-related or something else.
The temperature warning light indicates engine overheating, which can damage oil by breaking down its viscosity. If this light appears, pull over immediately and let the engine cool before checking coolant levels.
DIY vs. Professional Oil Changes: Weighing the Risks
The financial argument for DIY oil changes is straightforward: a professional quick-lube service costs $30-75, while a DIY change costs roughly $15-30 for oil and a filter. Over five years, DIY saves $300-400. However, professional services include inspections of belts, hoses, fluids, and filters that catch problems before they become expensive. They also provide documentation that supports warranty claims and resale value.
Safety risk is real. According to ConsumerAffairs mechanic trust survey data, 78% of people with cars don't always trust their mechanics. This skepticism drives DIY adoption, but it also means people attempt work they're not confident performing, which increases risk.
Warranty implications matter. Some manufacturers specify that maintenance must be performed by authorized technicians to preserve warranty coverage. Check your warranty documentation before proceeding with DIY work.
The real advantage of DIY is control and documentation. When you change your own oil, you know exactly what went in, when it went in, and what condition the vehicle was in. This documentation advantage often outweighs the modest cost savings.
| Aspect | DIY Oil Change | Professional Service |
|---|---|---|
| Cost per change | $15-30 | $30-75 |
| Time required | 45-60 minutes | 15-20 minutes |
| Safety risk | Moderate to high | Minimal |
| Documentation | User-created | Professional receipt |
| Warranty impact | Potential risk | No risk |
| Inspection included | No | Yes |
| Resale value benefit | High (if documented) | Standard |
Changing your own oil safely is achievable if you respect the process, invest in proper equipment, and follow every safety step without shortcuts. If you do proceed with DIY maintenance, document everything: date, mileage, oil type, filter brand, and any observations about your vehicle's condition. Over time, this record becomes invaluable for maintaining your vehicle correctly and proving to future buyers that your car received consistent, careful maintenance.
=== FAQ ANSWERS (audit these too, same rules) ===
[1] Q: Is it risky to change your own oil? A: Yes, DIY oil changes carry real safety risks. Approximately 4,822 people annually visit emergency rooms with injuries from car jack malfunctions, some resulting in amputations. Never work under a vehicle supported only by a floor jack, always use jack stands or ramps with wheel chocks. Hot oil can cause severe burns, and improper disposal of used motor oil creates environmental hazards and legal liability. With proper equipment and precautions, risks are manageable, but they require discipline and attention.
[2] Q: What safety equipment is required for a DIY oil change? A: Essential safety gear includes jack stands (never rely on a floor jack alone), wheel chocks, safety goggles, heavy-duty work gloves, and a drain pan. Park on a flat, level surface and engage the parking brake. Ensure good ventilation to avoid fume inhalation. Let the engine cool slightly before starting, hot oil causes severe burns. A creeper or mat protects your back while working underneath. These items are non-negotiable for safe oil changes.
[3] Q: How do I properly dispose of used motor oil? A: Used motor oil is hazardous waste and must never go down a drain or into soil. One gallon of improperly disposed used oil can contaminate one million gallons of fresh water. Collect your used oil in a secure, labeled container and transport it to a licensed recycling facility, auto parts retailer, or municipal hazardous waste collection site. Most accept used oil free of charge. Check your local environmental agency or search online for drop-off locations near you.
[4] Q: What are the most common mistakes when changing oil? A: The most common error is using the wrong oil viscosity, check your owner's manual for the correct grade. Other critical mistakes include forgetting to screw the oil filter all the way (causing leaks), omitting the crush washer on the drain plug, overtightening the drain plug, and failing to refill with the correct amount of new oil. These errors can cause significant engine damage. Always consult your vehicle's service schedule and owner's manual before starting, and double-check each step.
[5] Q: Is it worth the money to change your own oil? A: The math is mixed. A DIY oil change saves roughly $15 per service compared to quick-lube facilities, but initial tool costs and your time investment reduce savings. Professional services often include complimentary inspections and warranty documentation that DIY changes lack. Vehicle repair costs have increased 28% over three years, making cost savings attractive, but factor in safety equipment, disposal logistics, and the risk of costly mistakes. For budget-conscious owners of older vehicles, DIY makes sense if done safely; for newer cars under warranty, professional service may preserve coverage.
Frequently Asked Questions
Is it risky to change your own oil?
Yes, DIY oil changes carry real safety risks. Approximately 4,822 people annually visit emergency rooms with injuries from car jack malfunctions, some resulting in amputations. Never work under a vehicle supported only by a floor jack, always use jack stands or ramps with wheel chocks. Hot oil can cause severe burns, and improper disposal of used motor oil creates environmental hazards and legal liability. With proper equipment and precautions, risks are manageable, but they require discipline and attention.
What safety equipment is required for a DIY oil change?
Essential safety gear includes jack stands (never rely on a floor jack alone), wheel chocks, safety goggles, heavy-duty work gloves, and a drain pan. Park on a flat, level surface and engage the parking brake. Ensure good ventilation to avoid fume inhalation. Let the engine cool slightly before starting, hot oil causes severe burns. A creeper or mat protects your back while working underneath. These items are non-negotiable for safe oil changes.
How do I properly dispose of used motor oil?
Used motor oil is hazardous waste and must never go down a drain or into soil. One gallon of improperly disposed used oil can contaminate one million gallons of fresh water. Collect your used oil in a secure, labeled container and transport it to a licensed recycling facility, auto parts retailer, or municipal hazardous waste collection site. Most accept used oil free of charge. Check your local environmental agency or search online for drop-off locations near you.
What are the most common mistakes when changing oil?
The most common error is using the wrong oil viscosity, check your owner's manual for the correct grade. Other critical mistakes include forgetting to screw the oil filter all the way (causing leaks), omitting the crush washer on the drain plug, overtightening the drain plug, and failing to refill with the correct amount of new oil. These errors can cause significant engine damage. Always consult your vehicle's service schedule and owner's manual before starting, and double-check each step.
Is it worth the money to change your own oil?
The math is mixed. A DIY oil change saves roughly $15 per service compared to quick-lube facilities, but initial tool costs and your time investment reduce savings. Professional services often include complimentary inspections and warranty documentation that DIY changes lack. Vehicle repair costs have increased 28% over three years, making cost savings attractive, but factor in safety equipment, disposal logistics, and the risk of costly mistakes. For budget-conscious owners of older vehicles, DIY makes sense if done safely; for newer cars under warranty, professional service may preserve coverage.
Start freeThis article was written using GrandRanker