 carjourney
From the CarJourney journal
Car Paint Scratch Repair: Best DIY Tips That Work
Last Updated: November 16, 2026
Quick Summary
The best DIY scratch repair depends on scratch depth. Run your fingernail across it: if it glides over, rubbing compound usually fixes it in about an hour, while deeper scratches need touch-up paint, primer, and clear coat applied in thin layers.
- Run your fingernail across the scratch; if it catches, it reaches the base coat or deeper.
- Wash and dry the area before testing, since dirt and wax can make scratches feel deeper.
- Apply rubbing compound in small sections using a pea-sized dab and light to moderate pressure.
- Match touch-up paint to your car's exact paint code, found on a door jamb sticker.
- Wait at least 24 hours before wet sanding or polishing a touch-up repair, and a week before washing.
Table of Contents
- Test Scratch Depth Before You Buy Anything
- Gather Your Tools and Paint-Code Match Before Starting
- How to Remove Minor Surface Scratches with Rubbing Compound
- How to Remove Deep Scratches from Car Without Repainting
- Best Deep Scratch Remover for Cars: Products Worth Considering
- Car Scratch Repair Cost vs DIY: Time, Money, and Difficulty
- Protecting Your Repair and Planning Your Next Step
- Frequently Asked Questions
Test Scratch Depth Before You Buy Anything
Before buying any product, figure out how deep the scratch goes, since the right scratch repair depends on it. The wrong product on the wrong depth either does nothing or makes it worse.
Car paint has several layers. The clear coat is the glossy top layer that protects the color. Under it sits the base coat, which holds the color, then the primer, then bare metal or plastic.
The Fingernail Test and What It Tells You
The fingernail test is the simplest check you can do at home. Run your fingernail gently across the scratch and note what happens.
- Nail glides over it: The scratch likely sits in the clear coat only, usually the easiest repair.
- Nail catches slightly: The scratch probably reaches the base coat. It needs color work, not just polish.
- Nail catches hard, or you see gray, white, or bare metal: The scratch has likely reached the primer or metal. Expect a longer repair.
Wash and dry the area first. Dirt and wax can make a shallow scratch feel deeper, or hide a deep one.
Identifying Clear Coat, Base Coat, and Primer Damage
Look at the scratch in good light, ideally in shade or with a flashlight held at an angle. Each layer looks different when damaged:
- Clear coat damage looks like a fine, light line. The color underneath still looks correct.
- Base coat damage shows the color looking dull, faded, or lighter where the scratch runs.
- Primer damage often shows a gray, tan, or white line.
If you see rust, act soon, it spreads under paint, and a small scratch can become a larger repair within months.
Watch out: Do not sand or buff a deep scratch before you know its depth. Aggressive work on a scratch that reaches the primer can burn through the layers you still need.
Gather Your Tools and Paint-Code Match Before Starting
Good results depend on having the right materials ready before you begin.
For most minor scratches, gather:
- Car wash soap and two clean microfiber towels
- Rubbing compound and a clean foam or microfiber applicator
- A pad for your drill or a clean cloth for hand work
For deeper scratches, you may also need:
- Touch-up paint in your car's exact color
- Primer, usually a small pen or brush bottle
- Clear coat in a pen or spray can
Check that your products fit your paint type and finish. A product made for a clear-coated factory finish may not suit an older single-stage paint job.
Watch out: Avoid household remedies such as toothpaste, baking soda, or vinegar on your paint. They can dull clear coat and leave fine scratches of their own.
How to Remove Minor Surface Scratches with Rubbing Compound
Minor surface scratches that only reach the clear coat usually respond well to rubbing compound, the most common and least risky fix for a light scratch.
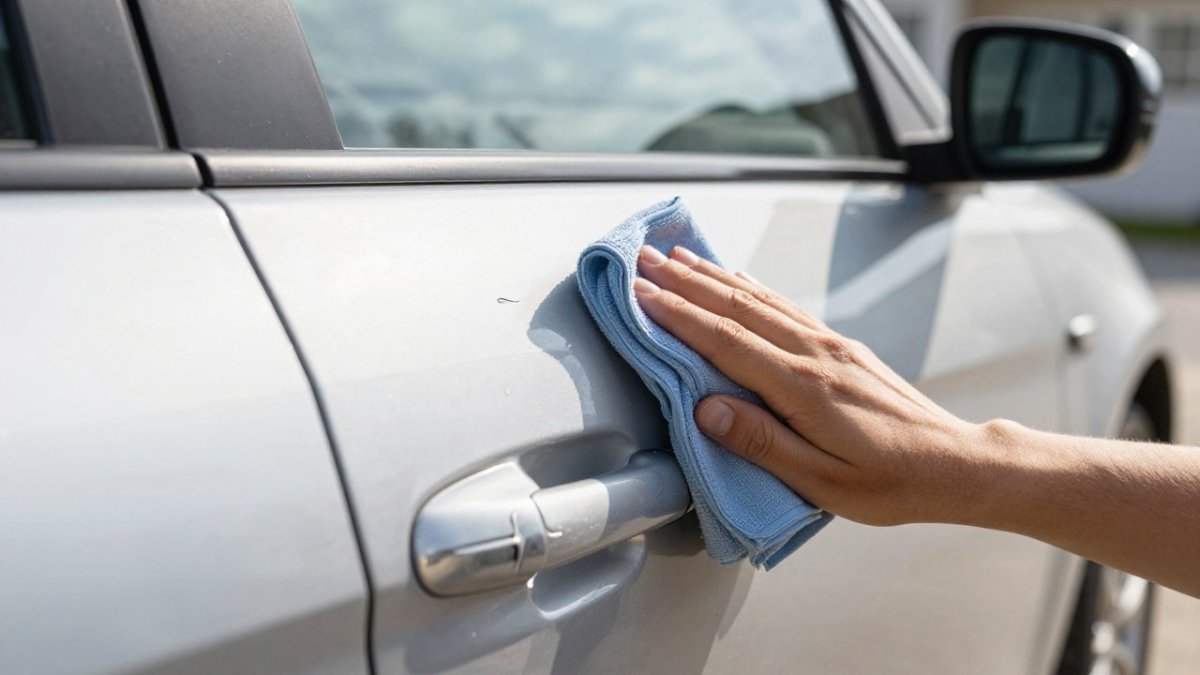
!Close-up of a hand in a microfiber cloth buffing a small scratch on a silver car door in a sunlit home driveway
- Wash and dry the area. Remove dirt and grit so you do not grind it into the paint.
- Tape off the edges. Place masking tape around nearby trim and plastic pieces.
- Apply a small amount of compound. Put a pea-sized dab on your applicator, not a large glob.
- Work in small sections. Rub in straight, overlapping strokes along the scratch, using light to moderate pressure.
- Wipe away the residue. Use a clean microfiber towel and check your progress in good light.
- Repeat if needed. Give the area another light pass if the scratch is still visible.
- Protect the finish. Once the area looks right, apply a wax or sealant to restore shine.
Work in shade, not direct sun, and let the panel cool first, since hot paint can make compound dry too fast.
Expected result: A light scratch that fades or disappears entirely after one or two passes. If the scratch still catches your fingernail after polishing, it is deeper than a surface scratch and needs a different approach.
How to Remove Deep Scratches from Car Without Repainting
Deep scratches that reach the base coat, primer, or bare metal need more than polish. Avoiding a full repaint is realistic for small, well-defined scratches.
A small deep scratch typically takes two to four hours of hands-on work spread across two or three days, because each coat needs time to flash and cure. Rushing leads to solvent pop, uneven color, or a soft finish that peels within months.
Supplies and Product Compatibility
Gather a cleaning kit, touch-up paint matched to your paint code, primer, clear coat, fine wet-sanding paper, and polishing compound. Confirm compatibility: a lacquer-based touch-up paint will not bond properly over a factory two-part clear coat, and a solvent-based clear coat can lift a waterborne base coat if applied too soon. When in doubt, buy a matched kit from a single manufacturer.
Step-by-Step Repair
- Clean and dry the scratch. Use a wax and grease remover or isopropyl alcohol on a clean microfiber cloth. Let the area dry fully before applying anything.
- Feather the edges. If the scratch has a raised lip, wet sand lightly with 1500-grit paper wrapped around a small block, keeping the paper wet. This step is only for scratches that reach the base coat or primer; skip it on clear-coat-only scratches.
- Apply primer to bare metal or plastic only. Use a thin coat of primer in the scratch, not on the surrounding paint. Let it dry per the label, typically 30 minutes to an hour for a small touch-up pen.
- Build up color in thin coats. Apply several thin layers of touch-up paint rather than one thick one. Let each layer flash dry, usually 10 to 20 minutes, before adding the next. Build until the color sits just slightly above the surrounding paint.
- Level the surface. Once the color is fully dry, wet sand gently with 1500- to 2000-grit paper, keeping the paper wet with water and a drop of mild soap. Work in small circles and check progress often. Stop as soon as the repair is level with the surrounding clear coat.
- Apply clear coat. Add two or three thin coats of clear coat, letting each dry between layers per the label. Aerosol clear coat often needs 10 to 15 minutes between coats; brush-on clear coat may need longer.
- Polish the repair. After the clear coat cures, polish the area lightly with a fine polishing compound to blend it into the surrounding paint. Do not polish until the clear coat has fully cured, which can take several days for aerosol products.
Conditions and Curing Times
Work in a dry space at 60°F to 80°F, away from dust and direct sun. Once the repair has cured fully, careful sanding and polishing can help blend the touch-up into the surrounding paint, while DMH Automotive Enterprises offers another perspective on scratch repair techniques.
Watch out: Do not apply clear coat over a base coat that is still tacky. Trapped solvent will cause the clear coat to wrinkle or lift, and the only fix is to sand the whole repair back down and start over.
Troubleshooting Common Failures
- Visible touch-up blob: The color was applied too thick or not leveled. Wet sand with 2000-grit paper and polish again.
- Color mismatch: The paint code was wrong or the paint faded. A close match is realistic on older paint; an exact match may require a professional blend.
- Peeling clear coat: The base coat was not fully dry or was contaminated with wax or oil. Clean with a wax and grease remover before recoating.
Expected result: A deep scratch that is much less visible and protected from rust. The repair may not match the factory finish perfectly, especially on older paint, so expect a close match rather than an exact one.
Best Deep Scratch Remover for Cars: Products Worth Considering
Several scratch removers are commonly used by DIY owners. Prices vary by retailer and package size, so check current listings before you buy.
| Product | Recognition in Tested Roundup | Best For | Typical Package |
|---|---|---|---|
| Meguiar's Scratch Eraser Kit | Best overall scratch remover | DIY users wanting a top-rated pick | Drill-mounted eraser pad plus 4 oz. compound |
| Formula 1 Scratch Out | Best budget scratch remover | Shoppers seeking a lower-cost option | 7 oz. liquid bottle |
| Meguiar's Scratch X | Honorable mention | Those comparing additional options | 8 oz. tube or bottle |
For a complete picture, see Car and Driver's tested roundup of the best car scratch removers.
Matching the Product to the Scratch
No single product works for every scratch. Match the product to your scratch depth, and do a small test patch first.
Watch out: Do not use a drill-mounted eraser pad on a scratch near an edge, body line, or plastic trim. The pad can burn through the clear coat on sharp edges in seconds, and that damage cannot be polished out.
Car Scratch Repair Cost vs DIY: Time, Money, and Difficulty
Deciding between a DIY fix and a professional repair comes down to scratch depth, your time, and how much risk you can accept.
Here is how the options generally compare:
- Light surface scratches: Low cost, about an hour, easy. DIY is usually the right call.
- Deep scratches on a small area: Moderate cost, a few hours spread over several days, moderate difficulty. Good for careful DIYers.
- Deep scratches across a large panel or with rust: Higher cost, longer time, harder to do well. A professional is often the better choice.
Prices for products and professional work vary widely by region, shop, and damage, so get written quotes from local shops before you decide.
Watch out: Do not attempt a DIY repair on a damaged area with rust spreading under the paint.
Protecting Your Repair and Planning Your Next Step
Once your repair cures, protect it. Wash the area by hand with mild soap, avoid automatic car washes with harsh brushes for several weeks, and reapply wax or sealant every few months to keep the repaired area blending with the rest of the car.
A repaired car is also easier to sell when its history is clear. If you plan to sell, keeping a record of your repair, the products you used, and the maintenance you completed can help a buyer trust the car's condition.
Frequently Asked Questions
How do I repair scratches in my car paint myself?
Start by washing and drying the area, then test the scratch depth with your fingernail. Light scratches that catch only the clear coat usually respond to a rubbing or scratch-removal compound applied by hand in small circular motions. Deeper scratches that reach the base coat or primer need touch-up paint and clear coat. Work in a shaded spot, let each product cure as its label directs, and stop if you start to damage the surrounding paint.
Does touch-up paint actually hide deep scratches effectively?
Touch-up paint can make a deep scratch much less noticeable, but it rarely disappears completely. Results depend on matching the paint code exactly, applying thin layers, and letting each layer dry before adding the next. Scratches that go through to bare metal or show significant rust typically need professional attention for a full repair. A well-applied touch-up often looks best from a normal viewing distance.
What is the difference between a clear coat scratch and a base coat scratch?
A clear coat scratch affects only the transparent top layer, so it often looks like a hazy line that disappears when wet. A base coat scratch goes through the color layer and shows the true paint color or a lighter, chalky line. Clear coat scratches are usually fixable with compound, while base coat scratches generally require touch-up paint followed by clear coat to restore protection and gloss.
How can I prevent further damage while attempting a DIY scratch repair?
Wash and dry the panel thoroughly before you start, and avoid working on hot metal or in direct sun. Use soft microfiber cloths and fresh applicator pads so you do not introduce new scratches. Apply compounds and paint in thin coats, and wear gloves and eye protection when handling chemicals. Dispose of used rags and sandpaper according to your local rules, and keep products out of reach of children and pets.