 carjourney
From the CarJourney journal
7 Steps to Upgrade Your Racing Car Coolant System
Last Updated: October 25, 2026
Quick Summary
A racing car coolant system upgrade involves diagnosing your current cooling system, installing a high-flow water pump and larger aluminum radiator, switching to racing coolant, and validating that coolant temperature drops 10-20°F under load compared to your baseline.
- Factory coolant boils at 265°F; racing coolant stays stable up to 310-320°F in pressurized systems.
- A 3-row aluminum radiator handles 30-40% more heat than factory 2-row units; 4-row handles 50-60% more.
- High-flow water pumps move 20-40% more coolant volume than factory pumps, typically rated 40-80 GPM.
- Always flush the old system three times with distilled water before refilling to remove deposits that reduce heat transfer by 15-25%.
- Installation takes 4-6 hours and requires bleeding air by running the engine until both radiator hoses are hot.
Table of Contents
- Diagnose Your Current Cooling System Before Upgrading
- Understanding Race Car Radiator Upgrade Options
- Selecting a High-Flow Water Pump for Racing
- Racing Coolant vs. Regular Coolant: What Matters
- Installing Your Racing Car Coolant System Upgrade
- Cooling System Upgrade Checklist and Common Mistakes
- Testing and Validating Your Upgraded Cooling System
- Track Your Cooling Upgrades in Your Build Profile
- Frequently Asked Questions
Diagnose Your Current Cooling System Before Upgrading
Before spending money on a racing car coolant system upgrade, know what's actually failing. Many teams skip this and buy parts that don't solve their problem.
Start by checking your current cooling system under load. Drive the car hard for 10-15 minutes, then pull over safely and check these three things:
- Coolant temperature at full throttle. Most factory systems run 180-210°F. If yours hits 220°F or higher during sustained driving, heat is your limiting factor.
- Coolant condition. Open the radiator cap when the engine is cool. Look for rust, discoloration, or sludge. Brown or milky coolant means your system is breaking down.
- Airflow and radiator condition. Check if the radiator core is clogged with debris. Feel if the cooling fan is spinning hard enough. A weak fan can't push air through the core.
Document what you find. This diagnosis tells you exactly what to upgrade: a larger radiator if capacity is the problem, better coolant and a flush if coolant is degrading, a high-flow pump if the water pump isn't moving coolant fast enough.
Logging these baseline numbers in your build profile before you start, including coolant temperature, coolant condition rating, and current radiator type, can help you validate whether your upgrade actually worked.
Understanding Race Car Radiator Upgrade Options
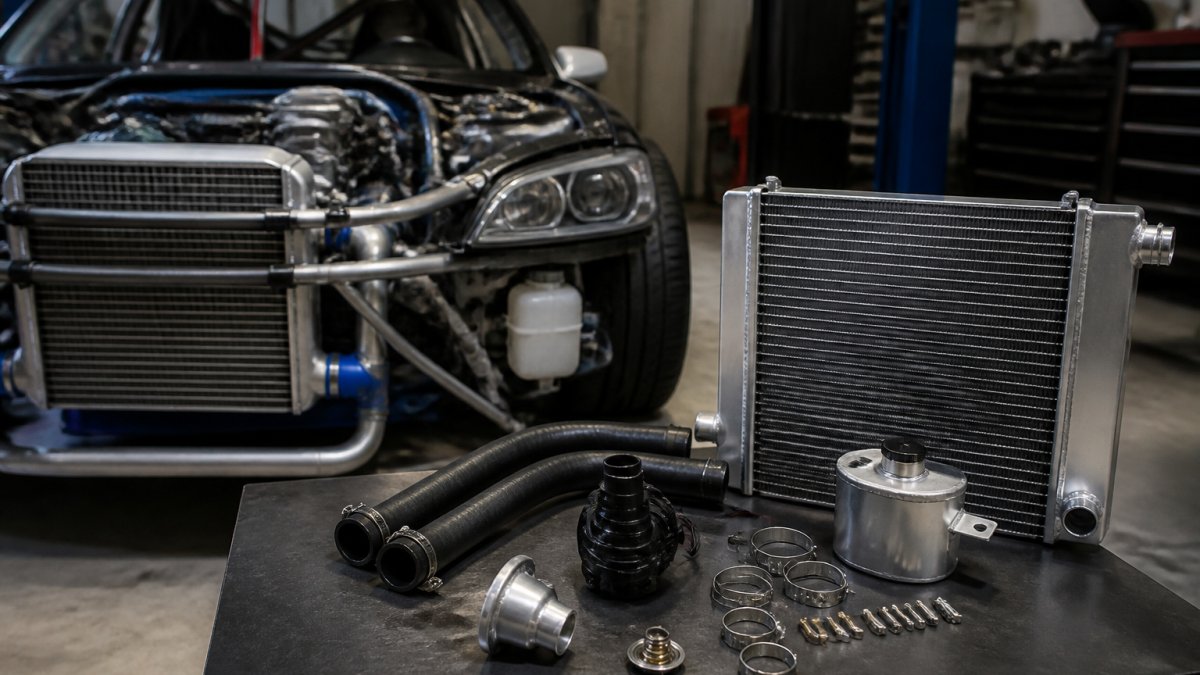
A race car radiator upgrade focuses on core size, construction material, and airflow design. The right radiator depends on your engine's heat output and available engine bay space.
Aluminum radiators are the racing standard. They transfer heat faster than copper-brass and weigh less. Most racing applications use 3-row or 4-row aluminum cores instead of the factory 2-row design.
Core size matters directly. A 3-row aluminum radiator handles roughly 30-40% more heat than a factory 2-row unit. A 4-row core handles 50-60% more.
Radiator hoses also matter. Factory hoses are designed for low-pressure systems; upgraded racing systems use reinforced hoses rated for higher pressure and flow. Larger diameter hoses reduce restriction and allow faster coolant circulation.
Mounting position affects airflow. Front-mounted radiators get direct air from the grille; side- or rear-mounted radiators rely on secondary airflow and perform worse under sustained load.
Selecting a High-Flow Water Pump for Racing
Your water pump circulates coolant through the engine block and radiator. A high-flow water pump for racing moves more coolant per revolution, which means faster heat transfer.
Rebuilding My Race Car After the Crash | AlloyWorks Radiator Install & Cooling Upgrade
AlloyWorks
Factory water pumps are belt-driven and designed for efficiency, not maximum flow. A racing-spec pump typically moves 20-40% more coolant volume than the original, reducing the time coolant spends in the engine block before returning to the radiator.
Choose a pump matched to your engine's displacement and horsepower. A 350-cubic-inch engine producing 400 horsepower needs different flow than a 427-cubic-inch engine making 600 horsepower. Most pump manufacturers provide flow ratings in gallons per minute (GPM).
Pump material affects durability. Cast iron pumps are cheap but heavy. Aluminum pumps save weight and resist corrosion better. For a race car, aluminum is the better choice even though it costs more.
Belt-driven pumps use a serpentine belt connected to the crankshaft.
Racing Coolant vs. Regular Coolant: What Matters
Racing coolant vs. regular coolant differs in heat transfer capability, boiling point, and additive packages.
Factory coolant is optimized for long drain intervals and corrosion protection.
Racing coolant uses silicate-free additives that don't leave deposits, plus bittering agents to prevent accidental ingestion.
Boiling point matters under sustained load. A quality racing coolant boils at 275-285°F without pressurization and stays stable up to 310-320°F in a pressurized system, giving you a safety margin before vapor lock occurs.
Wetting agents in racing coolant improve heat transfer efficiency by helping coolant wet metal surfaces more completely, reducing the boundary layer between liquid and metal.
Mix racing coolant with distilled water, not tap water, minerals in tap water build up over time. Use a 50/50 mix for most street-legal race cars.
Installing Your Racing Car Coolant System Upgrade
A racing car coolant system upgrade requires draining the old system, installing new components, and bleeding air from the lines. Organize your parts, budget, and project workflow with a system designed for complex multi-step upgrades. Set aside 4-6 hours and work in a clean, well-lit space.
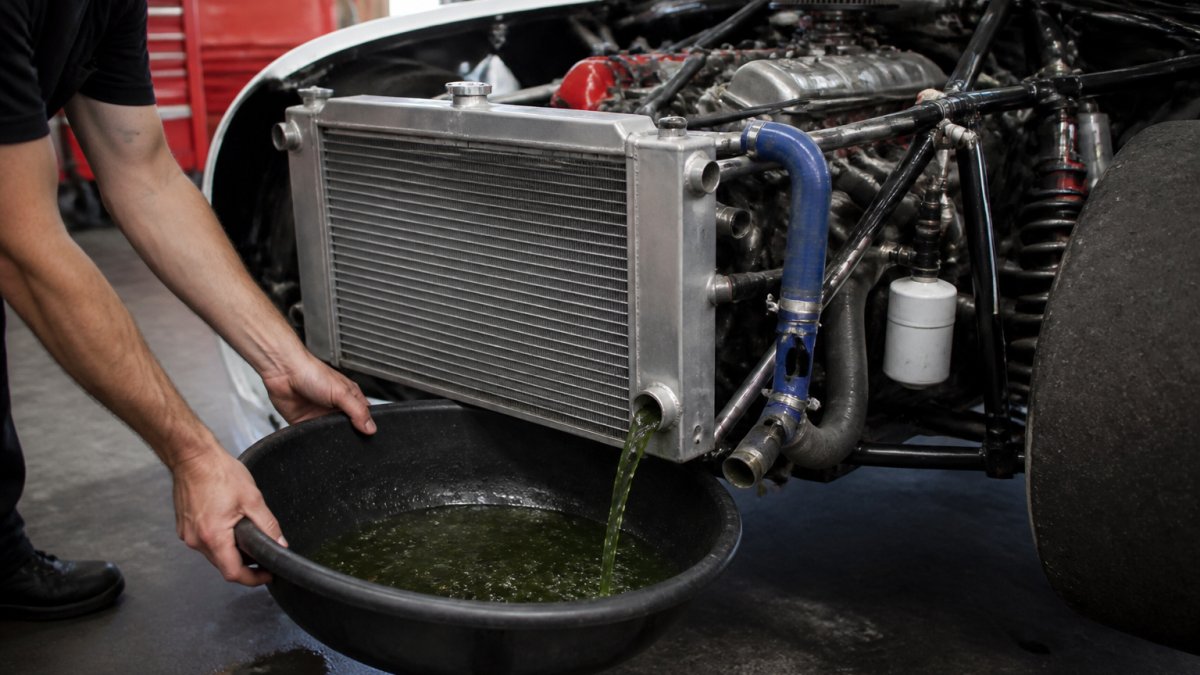
Draining and Flushing the Old System
Start with the engine cold. Never open a radiator cap on a hot engine. Pressure can force hot coolant out and cause severe burns.
Locate the drain plug at the bottom of the radiator. Place a drain pan underneath. Open the drain plug and let the old coolant flow completely. This takes 10-15 minutes.
Next, open the engine block drain plug if your engine has one. Most racing engines have a block drain on the side or bottom of the engine.
Flush the system with distilled water. Close the drain plugs, fill the radiator with distilled water only, and run the engine 5-10 minutes at idle to loosen old deposits.
This flushing step is critical. Old coolant leaves deposits inside the radiator core and engine passages that reduce heat transfer efficiency. A thorough flush removes them and prepares the system for new coolant.
Installing New Components and Bleeding Air
Install the new high-flow water pump per the manufacturer's instructions. Most bolt directly to the engine block using existing holes.
Connect the new radiator hoses. Use hose clamps rated for pressurized systems. Tighten clamps firmly but do not over-tighten, which can crush the hose.
Fill the radiator slowly with your racing coolant mixture. Pour it in gradually to allow air to escape naturally. Fill until the coolant reaches the filler neck.
Bleeding air is essential, air pockets create hot spots and reduce cooling efficiency. Start the engine and let it idle, watching the coolant level in the radiator.
Run the engine at idle for 10-15 minutes, then feel the upper and lower radiator hoses, both should be hot.
Once both hoses are hot and the coolant level stays stable, turn off the engine and let it cool. Check the level again when cold.
Cooling System Upgrade Checklist and Common Mistakes
Use this checklist before you start your racing car coolant system upgrade:
| Task | Status | Notes |
|---|---|---|
| Document baseline coolant temperature under load | [ ] | Record in CarJourney before upgrade |
| Drain old coolant completely | [ ] | Use drain pans; dispose properly |
| Flush system with distilled water three times | [ ] | Until water runs clear |
| Install new high-flow water pump | [ ] | Use gasket sealer; tighten in star pattern |
| Connect new radiator hoses with pressure-rated clamps | [ ] | Hoses should not slip under hand pressure |
| Fill with racing coolant mixture (50/50 concentrate and distilled water) | [ ] | Pour slowly to release air |
| Bleed air from system by running engine and squeezing hoses | [ ] | Both radiator hoses should be hot |
| Check coolant level when cold | [ ] | Should be between min and max marks |
| Test under load and record new temperature | [ ] | Compare to baseline |
Common mistakes waste time and money:
- Mixing coolant types. Never mix old coolant with new racing coolant. The additives can react and form sludge. Always flush completely before refilling.
- Skipping the flush. Old deposits reduce heat transfer by 15-25%. A thorough flush is not optional.
- Trapping air in the system. Air pockets create hot spots that can warp cylinder heads. Bleed the system properly and verify both radiator hoses are hot before driving.
- Using tap water. Minerals in tap water build up inside the radiator core and engine passages over time. Use distilled water only.
- Oversizing the radiator without upgrading the pump. A larger radiator needs a high-flow pump to move coolant through it efficiently. Mismatch reduces performance.
- Ignoring hose condition. Old hoses can burst under pressure from a new system. Replace all hoses when you upgrade.
Testing and Validating Your Upgraded Cooling System
After installation, validate that your upgrade actually works. Most teams fall short here, installing parts and assuming the problem is fixed without measuring.
Drive the car hard for 10-15 minutes, a controlled test, not a full race.
Check your coolant temperature at the end of this test. Compare it to your baseline temperature from before the upgrade. Your new temperature should be 10-20°F lower than the factory system under the same load.
If the temperature dropped by less than 10°F, something is wrong. Possible causes:
- Air still trapped in the system. Run the engine again with the radiator cap off and squeeze the upper hose to release more air.
- Thermostat stuck closed. A faulty thermostat blocks coolant flow. Remove and test it by heating it in water. It should open at the rated temperature.
- Water pump not spinning fast enough. Check that the pump belt is tight and the pump impeller is spinning freely.
- Radiator core clogged. If the radiator was not flushed properly, deposits can block airflow through the core. You may need to have it professionally cleaned.
If the temperature dropped by 20°F or more, your upgrade is working well. Logging this result along with the date, ambient temperature, and driving conditions can make this data part of your build history.
Document your cooling system upgrade with photos and receipts, including radiator capacity, water pump GPM rating, and coolant type. This is valuable if you sell the car, buyers see performance upgrades backed by real data.
Track Your Cooling Upgrades in Your Build Profile
Organizing your cooling system upgrade in one place keeps your build history clear.
Log the old system first. Use a dedicated tool to log mods, costs, and maintenance records for your racing car project.
Then log the new components. Record the radiator capacity, material, and core size. Document the water pump GPM rating and installation date.
Most importantly, log your test results. Record the new coolant temperature under the same load conditions. Compare it to baseline.
This documentation matters when you document car build upgrades in your build profile. Buyers trust verifiable records.
The data you log can become your build profile, which you can share with potential buyers to prove your car's history.
A racing car coolant system upgrade is not just about buying parts.
Track your work so your upgrade becomes part of your permanent build record.
Frequently Asked Questions
What is the best coolant for a racing car?
Racing coolant formulas prioritize heat transfer and thermal stability under sustained high-load conditions. Look for coolants with wetting agents and additives designed for motorsport use, which improve heat-transfer surfaces and maintain consistent operating temperature. Avoid mixing racing coolant with regular automotive coolant, as this reduces effectiveness. Always verify compatibility with your radiator material, aluminum radiators require specific coolant types to prevent corrosion.
How do I know if my racing car coolant system upgrade is working?
Monitor engine coolant temperature during track sessions using an accurate gauge. A successful upgrade should reduce peak operating temperature by 10-20 degrees Fahrenheit under the same driving conditions. Check coolant flow consistency and ensure no air pockets remain in the system after installation. Document baseline temperatures before upgrading and compare results after bleeding and conditioning the new system over several heat cycles.
Can I upgrade just the radiator without changing other cooling components?
A larger or higher-capacity aluminum radiator alone can improve cooling, but a complete racing car coolant system upgrade yields better results. Pairing a new radiator with a high-flow water pump, upgraded thermostat, and quality racing coolant ensures balanced heat management. Upgrading only the radiator may create bottlenecks in coolant flow or pressure, limiting the thermal benefits you'd otherwise gain.
How do I bleed air from my cooling system after installation?
Fill the system slowly while the engine is off, allowing air to escape naturally through the highest point. Start the engine and let it idle until the thermostat opens and coolant circulates. Top off the overflow tank as needed. Gently squeeze radiator hoses to release trapped air bubbles. Run the engine at varying RPMs for 10-15 minutes, then recheck levels. Proper bleeding prevents air pockets that reduce heat transfer and cause overheating.
Start free Add carjourney.io as a preferred source on Google →