 carjourney
The strongest short list of car-styling tools right now: Car Editor for photoreal AI previews, MODCAR.ai for free stacked-mod testing in a browser, Car AI for Android photorealism, AutoStyle.AI for quick iOS wrap experiments, MotorMia for data-driven build planning, ChopShop Car Styler for browser-based concept design, and California Concepts iConfigurator for in-person fitment-backed customization. Once you have a look you like, Carjourney keeps the receipts, part numbers, and build history organized so nothing gets lost between the visualizer and the installer.
- AutoStyle.AI — Quick iOS wrap, tint, and wheel previews from a single phone photo
- Car AI — Single-tap photorealistic paint, wrap, and wheel previews on Android
- Car Editor — Photoreal AI previews across web and mobile; preserves original photo lighting
- MODCAR.ai — Free browser tool; stack multiple mods and export high-res results
- MotorMia — Data-driven build advisor with parts compatibility and staged roadmaps
- ChopShop Car Styler — Browser-based concept configurator for design mockups and client demos
- California Concepts iConfigurator — In-shop wheel configurator backed by real installers in Redwood City, CA
- Carjourney — Documents your build: logs mods, scans receipts with AI, and creates shareable build profiles
Table of Contents
- How do the top car-styling apps compare side by side?
- How do car-styling tools actually produce previews?
- How to choose the right car-styling tool for your project
- Three quick workflows to test a tool on your own car
- Expert guidance: how to plan a staged build and avoid visualizer pitfalls
- Which tool should you try first?
- Key Takeaways
- Why documentation is the step most enthusiasts skip
- Carjourney keeps your build organized from first render to final sale
How do the top car-styling apps compare side by side?
The table below maps each tool to the scenario where it actually earns its keep.
| Tool | Best for | Platform | Visualization method | What you can visualize | Fitment support | Price | Export / shop links |
|---|---|---|---|---|---|---|---|
| Carjourney | Documenting and sharing multi-stage builds | Web + mobile | Build log / AI document scan | Mod history, receipts, before/after photos | AI-assisted notes; links to installer records | Freemium (free + Pro subscription) | Exportable build profiles for buyers and shops |
| AutoStyle.AI | Quick iOS visual experiments | iOS | AI photo transform | Wraps, tints, wheels | None listed | Free / in-app purchases | Share images |
| Car AI | Mobile-first Android photorealism | Android | AI photo transform | Paint, wraps, wheels, finish types | None listed | Free / in-app purchases | Share images |
| Car Editor | Highly realistic photo-based previews | Web + mobile | AI photo transform | Paint, rims, body kits, wraps | None listed | Free / in-app purchases | Export high-res |
| MODCAR.ai | Free stacked-mod browser testing | Web (browser) | AI photo transform | Color, wheels, body kits, stance | None listed | Free | High-res export |
| MotorMia | Multi-stage build planning and parts compatibility | Web | Data-driven advisor | Build roadmap, parts compatibility | Parts database, model-specific guidance | Not publicly listed | Build roadmap export |
| ChopShop Car Styler | Browser concept design and client demos | Web | 3D configurator | Car concepts, body modifications | Model library | Not publicly listed | Concept exports |
| California Concepts iConfigurator | In-person fitment checks with installer access | In-shop (Redwood City, CA) | In-shop configurator | Wheels, styling options | Direct installer fitment check | In-shop service pricing | Direct installer booking |
AutoStyle.AI works best when you want a fast answer on iOS: snap a photo, apply a wrap or tint, and share the result in under a minute. No desktop required.
Car AI does the same job on Android, with a focus on photorealistic single-tap results across paint, wraps, and multiple finish types. Available on Google Play.
Car Editor is the pick when lighting accuracy matters most. It preserves the shadows and reflections from your original photo, so a metallic wrap actually looks metallic rather than flat. Works on both web and mobile.
MODCAR.ai stands out for one specific reason: it is free, runs entirely in a browser, and lets you stack mods. You can layer rims, a body kit, and a color change in the same session and export a high-res result to bring to a shop.
MotorMia operates differently from the visual tools. Instead of rendering a photo, it takes your vehicle data and outputs a build roadmap with parts compatibility guidance. If you are planning a multi-stage project and need to know whether a set of coilovers will clear a specific wheel package, this is where to start.
ChopShop Car Styler suits designers and shops running client consultations. It is a custom web configurator built for concept-level mockups rather than photo-accurate previews.
California Concepts iConfigurator is the only entry here tied to a physical shop. The in-shop configurator at their Redwood City, CA location lets you preview wheels against your actual car before committing, with a technician available to confirm fitment on the spot. Customer reviews on Yelp back up the in-shop experience.
How do car-styling tools actually produce previews?
Three methods power every car styler on the market: AI photo transforms, 3D configurators, and data-driven build advisors. Each has a specific job it does well.
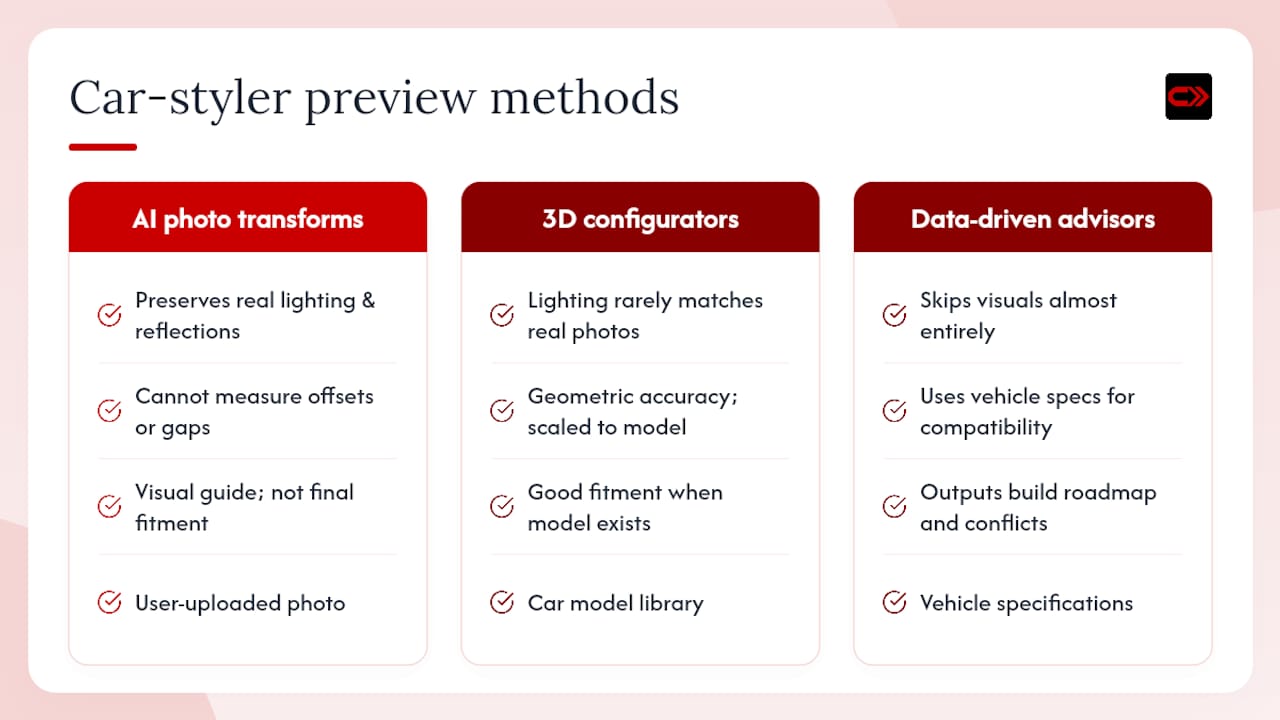
AI photo transforms (Car Editor, MODCAR.ai, Car AI, AutoStyle.AI) take your uploaded photo and apply changes directly to it. Because they work from your actual image, they preserve real-world lighting, reflections, and context. A satin black wrap on your car looks like satin black on your car, not a stock render. The limitation is that they cannot measure anything. Offset, clearance, and fender gap are invisible to the algorithm. MotorWeek notes that AI preview tools are best used as visual guides, not final fitment verification.
3D configurators (ChopShop Car Styler) work from a model library rather than your photo. You pick a car model, apply modifications, and rotate the view. The benefit is geometric accuracy: parts are scaled to the model’s dimensions. The tradeoff is that lighting rarely matches a real photo, and the tool is only as good as its model library.
Data-driven advisors (MotorMia) skip visuals almost entirely. They ingest your vehicle specs and output a build roadmap: which parts are compatible, what order makes sense, and where conflicts might arise. Use one when you are past the “what would this look like” stage and into “what will actually fit and in what order.”
Pro Tip: For the most accurate AI photo transform, shoot your car from a three-quarter front angle in flat, even daylight. Avoid harsh shadows across the body panels — the AI reads those as part of the car’s shape and will render the new finish around them, which distorts the result.
How to choose the right car-styling tool for your project
Match the tool to your primary goal first: visualization, fitment accuracy, or build planning. Everything else is secondary.
- Understand the pricing model — Free tools like MODCAR.ai cover most casual use cases. In-app purchases unlock higher resolution or additional mod types on mobile apps.
Red flags to avoid: low-res outputs, no model-specific support, no export function, pricing that is unclear or hidden behind multiple paywalls, and review sections that look fabricated.
Three quick workflows to test a tool on your own car
Workflow 1: Color and wrap test
- Photograph your car from a three-quarter front angle in flat daylight.
- Upload to Car Editor or MODCAR.ai and apply two or three wrap finishes.
- Compare them side by side at full resolution.
- Check that lighting and reflections look consistent across the body, not patchy.
- Export the highest-resolution version and save it for your shop consultation.
Workflow 2: Wheel and stance check
- Photograph the car from a straight side profile so the full wheel arch is visible.
- Load the image into MODCAR.ai or Car Editor and test three wheel sizes and styles.
- Overlay different tire profiles and note where the gap between tire and fender looks tight.
- Flag any fitment concerns in a note, then bring the export to a shop to verify PCD, offset, and clearance. A photoreal render cannot measure offset tolerances.
Workflow 3: Staged build planning
- Start with your baseline photo and layer mods in sequence: rims first, then body kit, then spoiler.
- Save a separate export after each layer so you have a visual record of each stage.
- Run the same sequence through MotorMia to check parts compatibility and build order.
- Build a short checklist of daily-usability impacts: ground clearance, tire noise, visibility.
Pro Tip: When sending preview images to a shop or retailer, include the wheel size, finish name, and any fitment notes alongside the image. A shop that receives “18x9.5 +35 offset, Gloss Gunmetal, fender gap looks tight at rear” alongside your export can give you a faster, more accurate quote than one receiving a photo alone. Use Carjourney’s build log to keep those specs attached to the image permanently.
Expert guidance: how to plan a staged build and avoid visualizer pitfalls
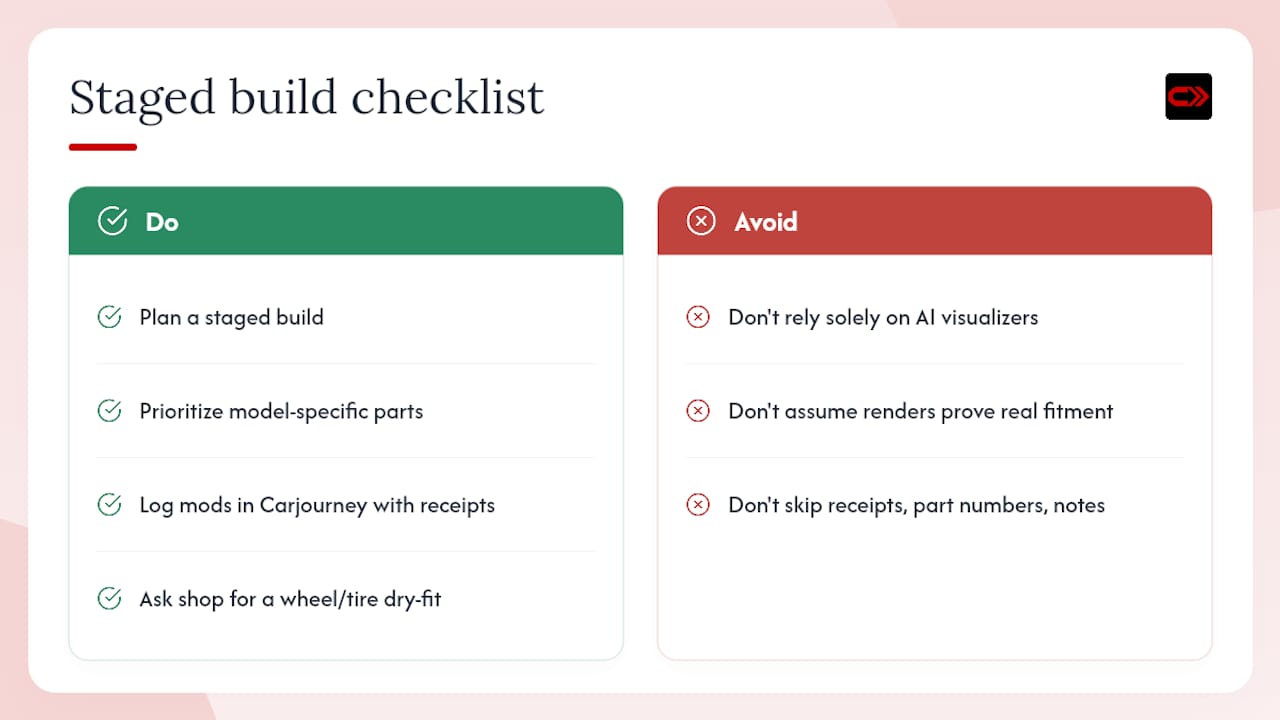
Plan a staged build, prioritize model-specific parts, and document every change with a tracker like Carjourney from the first modification.
Staged builds reduce mistakes because each phase is a contained decision. You validate fitment and aesthetics before the next layer adds complexity. An OEM+ approach, where you upgrade incrementally with high-quality parts that complement the factory setup, tends to preserve resale value while still delivering a noticeably refined result. Experts consistently recommend this path for enthusiasts who want a car that looks intentional rather than assembled from a wishlist.
MotorWeek cautions that AI visualizers, however convincing, cannot account for fender rolling, suspension geometry changes, or wheel clearance tolerances. A render that shows a flush fitment may require fender work in reality. Always validate a visual preview with a mock fit or a shop consult before ordering parts.
Documenting each modification with receipts, part numbers, and installer notes makes post-mod troubleshooting faster and raises buyer confidence at resale. Carjourney’s car build documentation guide walks through exactly what to log at each stage.
Pro Tip: Before committing to an aggressive fitment, ask your shop to do a dry-fit with the wheel and tire combination before mounting. It takes 20 minutes and costs nothing compared to a set of rubbed tires.
Which tool should you try first?
For most enthusiasts, the starting point depends on one question: what do you need to know right now?
- Try Car Editor or MODCAR.ai first — if you want to see what a wrap, color change, or new wheels look like on your actual car. Upload a photo, run a few finishes, and export the result in under five minutes.
- Try MotorMia first — if you are planning a multi-stage build and need parts compatibility guidance before spending anything. A visual preview is useless if the parts do not fit.
- Use Carjourney alongside any of these tools to log the previews you like, attach receipts as you buy parts, and build a shareable profile for your installer or a future buyer. A shareable build profile turns scattered screenshots and invoices into a single document that actually travels with the car.
Key Takeaways
AI photo transforms are the fastest way to preview styling changes, but fitment verification always requires a shop consult before ordering parts.
| Point | Details |
|---|---|
| Match tool to goal | Use AI photo transforms for visuals, data advisors for fitment planning, in-shop configurators for hands-on verification. |
| Fitment limits of AI | AI previews cannot measure offset, PCD, or clearance; always confirm with a shop before purchasing wheels or suspension. |
| Staged builds reduce risk | Layering modifications one phase at a time lets you validate fitment and aesthetics before adding complexity. |
| Export before you buy | Save a high-res export with part specs attached before contacting a shop or retailer. |
| Carjourney for documentation | Log receipts, part numbers, and build photos in Carjourney to create a shareable profile for installers and future buyers. |
Why documentation is the step most enthusiasts skip
Most car customization content focuses on the fun part: picking colors, swapping wheels, imagining a widebody. The part that actually protects your investment gets almost no attention.
Every build I have seen go sideways had one thing in common: no paper trail. A part gets installed, the receipt disappears, and six months later nobody can remember the offset on those wheels or which shop did the alignment. When something goes wrong, or when you try to sell the car, that missing information costs real money. A visualizer gets you excited. Documentation is what keeps that excitement from becoming an expensive mistake. Carjourney was built specifically for this gap: AI document scanning, build logs, and exportable profiles that make your build legible to anyone who works on the car after you. If you are serious about a multi-stage project, start the log before you buy the first part, not after.
Carjourney keeps your build organized from first render to final sale
The visualizers in this article help you decide what you want. Carjourney handles everything that comes after: logging the parts you ordered, scanning receipts with AI, tracking fitment notes from your installer, and building a profile you can hand to a buyer or a new shop.
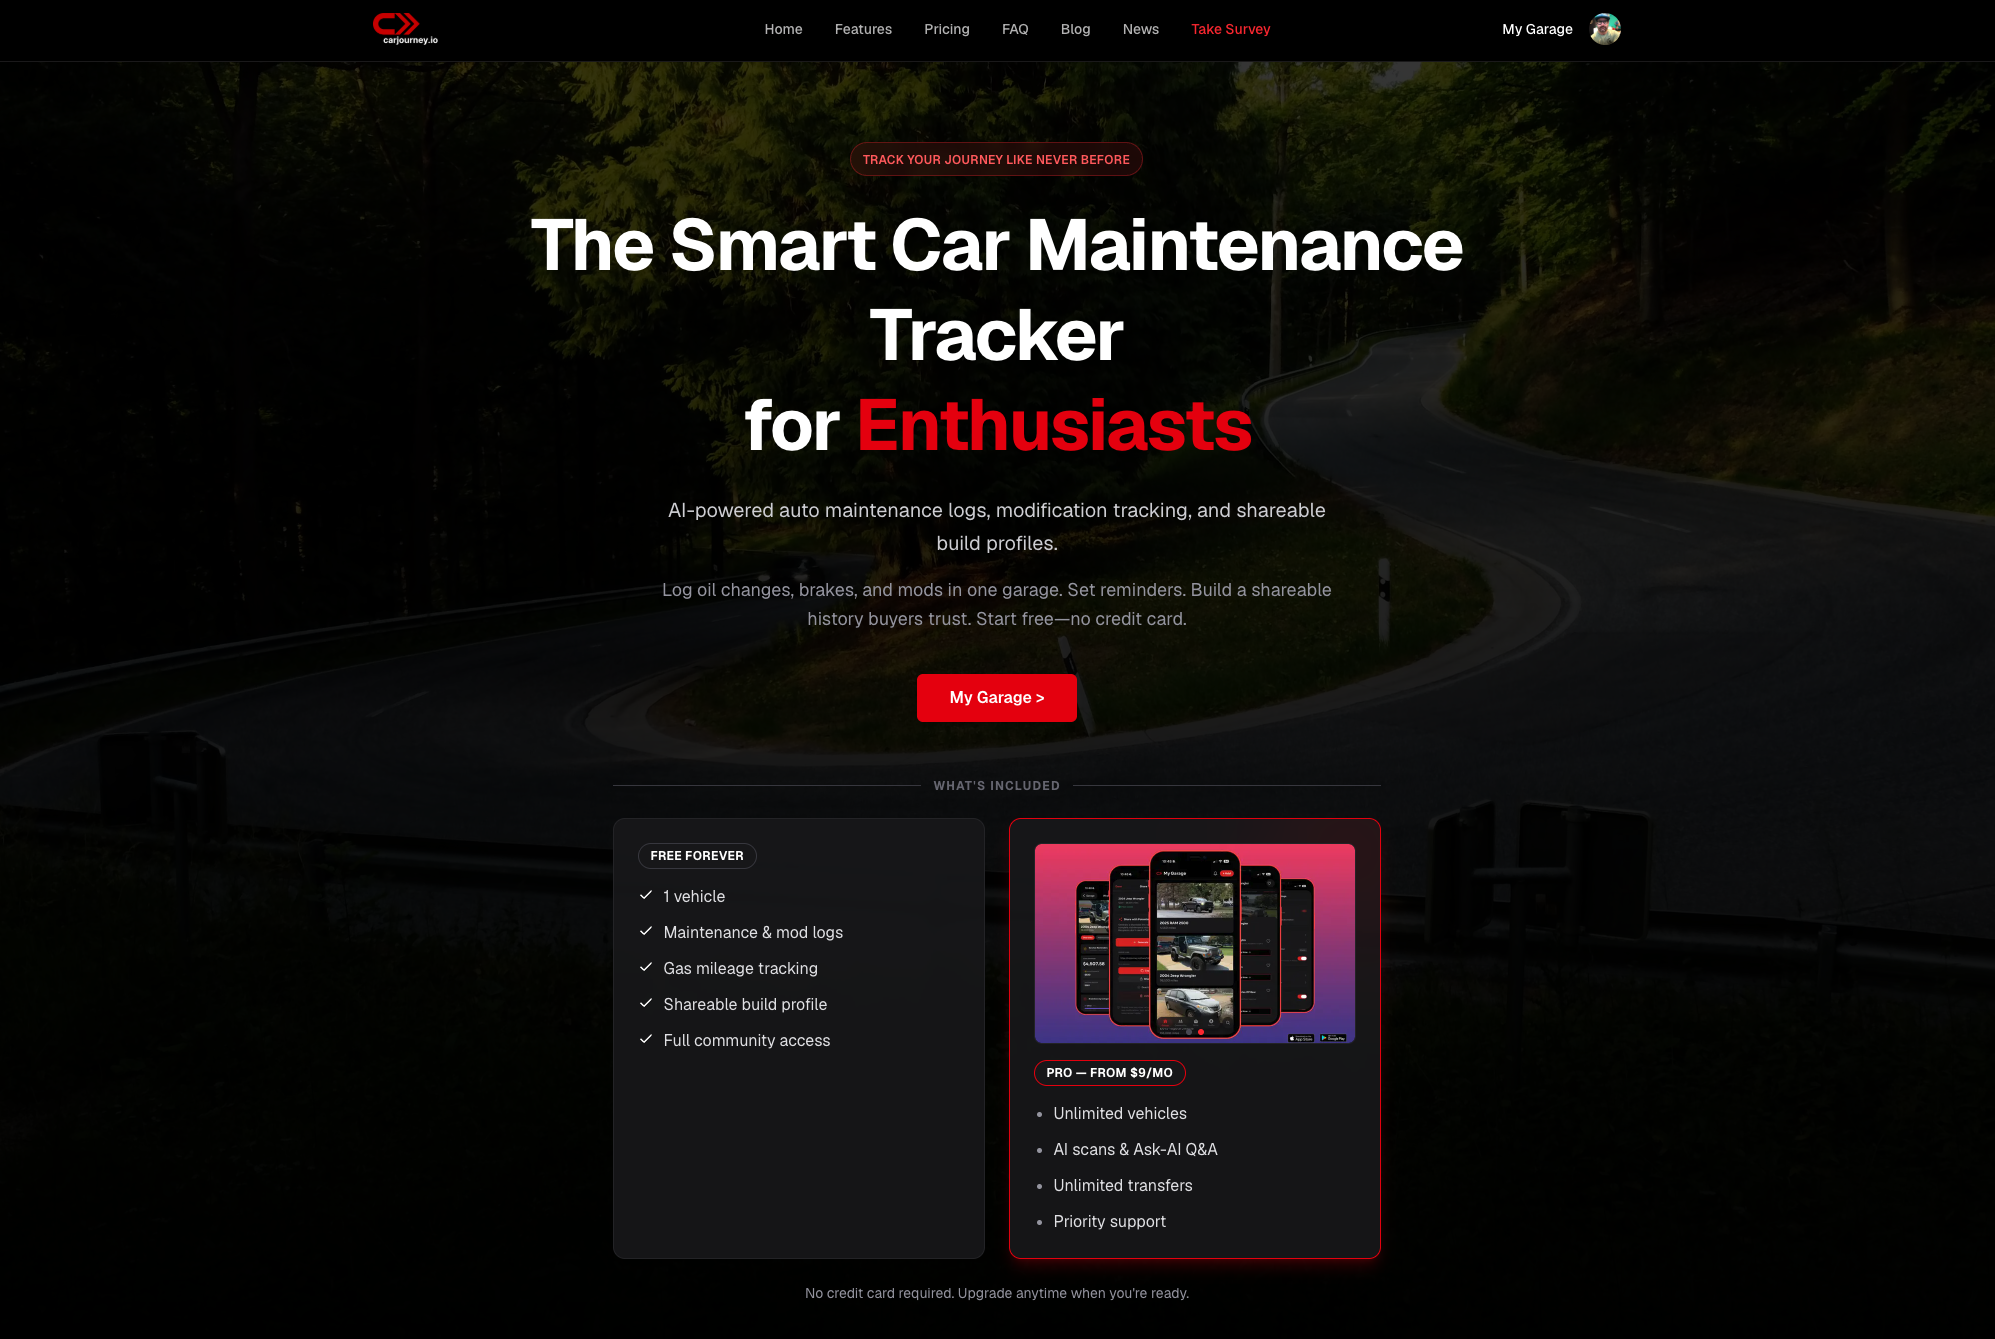
Where other tools stop at the preview, Carjourney picks up at the purchase. Attach before/after photos to each modification, set reminders for fitment-related maintenance, and export a complete build profile when you are ready to sell or hand the car off for the next stage. No scattered receipts, no forgotten part numbers.
Start a free Carjourney account and import your first build today.