 carjourney
From the CarJourney journal
How to Build a DIY Project Car Paint Booth Setup
Last Updated: November 5, 2026
Quick Summary
A DIY project car paint booth setup starts with measuring the garage space and vehicle clearance, then building a simple frame, enclosing it with heavy clear plastic sheeting, and adding an exhaust fan with filters. Good ventilation, fire safety, and local code checks matter as much as the frame itself.
- Allow at least 2 feet of walk-around space on each side of the vehicle.
- A 64 sq ft spray face at 75 fpm needs about 4,800 CFM of airflow.
- Use a pleated filter on intake and an overspray pad on exhaust.
- Keep the booth under negative pressure so fumes exit through the exhaust.
- Check local permit, exhaust, and hazardous waste rules before building.
Table of Contents
- Choosing a Garage Space and Measuring for Your Booth
- DIY Automotive Paint Booth Plans and Materials List
- Building the Frame and Enclosing the Booth with Plastic Sheeting
- Homemade Paint Booth Ventilation: Airflow, Fans, and Filters
- Fire, Chemical Exposure, and Local Code Safety Checks
- DIY Project Car Paint Booth Setup Cost and Budget Breakdown
- Pre-Spray Inspection, Teardown, and Finish Troubleshooting
- Documenting Your Build and Next Steps with CarJourney
- Frequently Asked Questions
Choosing a Garage Space and Measuring for Your Booth
A paint booth setup starts with the room, not the paint. Most home builders pick a garage bay first, then discover the car barely fits once the frame goes up. Measure before you buy a single piece of pipe.
Choose a space that gives you room to walk around the vehicle on at least three sides. Browse garage essentials and storage ideas for fitting a booth into a home garage. Good ventilation and an accessible door matter as much as square footage.
Measuring for vehicle clearance and walk-around access
Start with the car. Measure its length, width, and the highest point of the roof or mirrors. Then add clearance on every side.
- Allow at least 2 feet of walk-around space on each side
- Add 3 to 4 feet at the front and rear for moving around the frame
- Leave room above the roof for the top of the frame and sheeting
- Check that the garage door opens wide enough to pull the car out cleanly
Watch out: A booth that is too tight forces you to brush against wet paint. Measure twice before you cut any framing material.
DIY Automotive Paint Booth Plans and Materials List
A simple home booth uses a frame, a cover, and an air system. Keep the plan basic so you can build it in a weekend.
A typical starting list:
- Framing pipe or lumber, sized to your measurements
- Clear plastic sheeting, heavy enough to hold its shape
- Duct tape, clamps, and zip ties for sealing seams
- An exhaust fan rated for your garage size
- Furnace-style air filters for intake and exhaust
- A work light and a shop vacuum for pre-spray cleanup
PVC versus lumber framing
PVC pipe is light, cheap, and easy to cut and connect with fittings. It bends a little under load, so brace the corners well.
Lumber is stiffer and holds a heavier cover. It is harder to move once assembled, and it can hold dust in its grain. Many home builders choose PVC for a booth they plan to take down after each project.
Building the Frame and Enclosing the Booth with Plastic Sheeting
Build the frame first, then wrap it. Work from the floor up so the sheeting hangs down and seals against the garage floor.
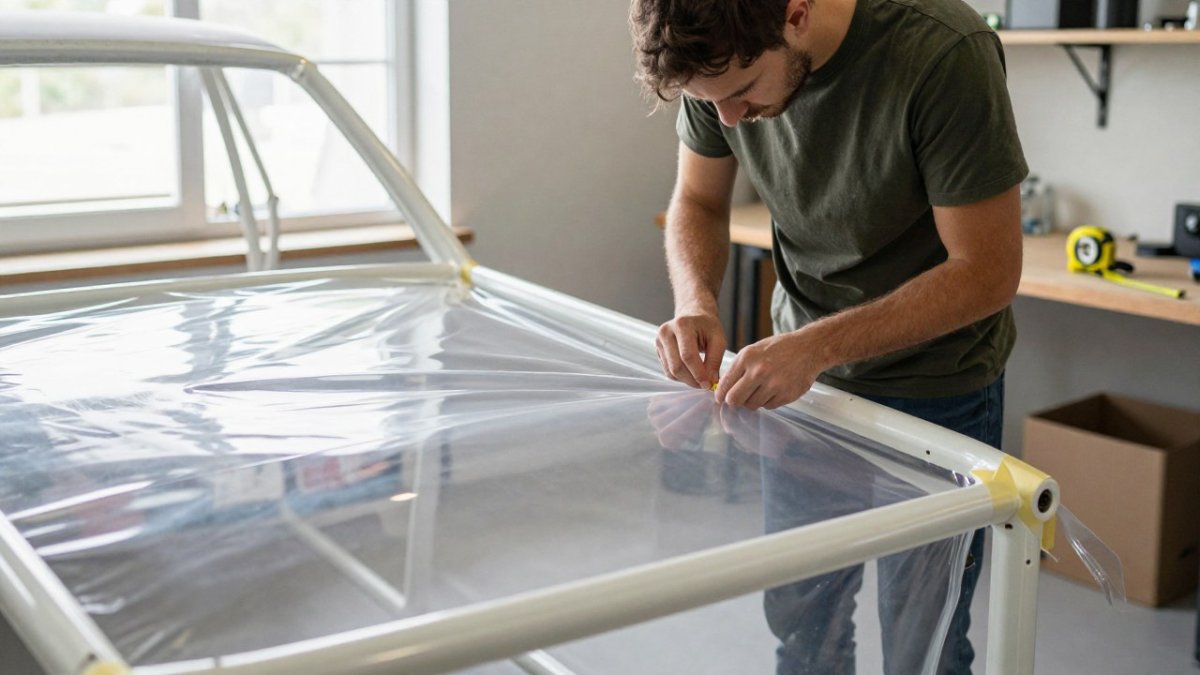
A hobbyist in a home garage fits clear plastic sheeting over a PVC frame, with duct tape and a tape measure on the workbench nearby.
Cover the frame with sheeting in overlapping strips. Tape every seam, and leave one flap as a door you can open and close. Pull the plastic tight so it does not sag into the paint path.
- Overlap seams by at least 6 inches
- Tape the bottom edge to the floor to block dust
- Install a door flap on the side you enter from
- Check for gaps around the fan and light openings
Homemade Paint Booth Ventilation: Airflow, Fans, and Filters
Airflow is the part of a DIY booth that most home builders get wrong, and it is the part that determines whether you get a clean finish or a garage full of flammable vapor. A booth without a working intake and exhaust is a health and fire risk, even at a small scale. Plan the airflow before you hang a fan.
Calculating required airflow and sizing exhaust
The working number is not "air changes per hour", it is face velocity, the speed of air moving across the open face of the booth where you spray.
Worked example: a booth 12 feet long by 8 feet wide by 8 feet high has a face area of 8 ft × 8 ft = 64 square feet (the open side you spray through). At 75 fpm, required airflow is 64 sq ft × 75 fpm = 4,800 cubic feet per minute (CFM). That is a real fan, not a box fan, most box fans move well under 1,000 CFM once they are loaded with a filter and ducting.
Second, keep the booth under negative pressure relative to the rest of the garage so fumes and overspray leave through the exhaust rather than drifting into the house.
Airflow direction should be from the clean side (intake filters) across the vehicle to the exhaust.
Filter selection, placement, and replacement
Use two filter stages. On the intake, a furnace-style pleated filter catches dust before it reaches the wet paint. On the exhaust, an overspray filter, often a fiberglass or polyester pad, traps paint solids so they do not coat your fan, your duct, or your neighbor's fence.
Placement rules that prevent bypass: seal the filter frame to the booth opening with tape or a gasketed frame so air cannot go around the filter instead of through it.
Replacement guidance: inspect intake filters before every spray session and replace them when they are visibly loaded or when a manometer (or a cheap differential pressure gauge) shows a pressure drop climbing toward the fan manufacturer's limit.
A common mistake is running the fan without a filter on the exhaust side. That sends overspray out to your neighbors and clogs the fan.
The article's key airflow and filter specifics are easier to scan side by side.
| Item | Value | Note |
|---|---|---|
| Example booth face area | 64 sq ft | 8 ft × 8 ft open spray face |
| Target face velocity | 75 fpm | Used to size the fan |
| Required airflow | 4,800 CFM | 64 sq ft × 75 fpm |
| Intake filter type | Furnace-style pleated | Catches dust before wet paint |
| Exhaust filter type | Fiberglass or polyester pad | Traps paint solids before the fan |
| Filter placement | Upstream of exhaust fan | Keeps the fan clean |
Fire, Chemical Exposure, and Local Code Safety Checks
Paint solvents are flammable, and their vapors are heavier than air, they pool at floor level and travel. That is why a garage booth is a fire and explosion hazard, not just a fume nuisance, and why the safety plan has to come before the frame goes up.
Fire and explosion hazards
Solvent vapors ignite from sources you may not think of: pilot lights on water heaters and furnaces, space heaters, grinder and saw sparks, shop-vac motors, and even static discharge from plastic sheeting.
Bonding and grounding matter more than most DIY guides admit. Static can build on plastic sheeting and on the vehicle itself; grounding the car and using grounded metal ducting or a grounded fan housing reduces the risk.
Watch out: plastic sheeting traps vapor. A booth that is sealed tight with no airflow concentrates flammable vapor fast; never spray with the fan off, even for a quick touch-up.
Chemical exposure and respiratory protection
A dust mask does nothing for solvent vapor. You need a respirator with the correct cartridge for the paint system you are using, typically an organic vapor cartridge, and often a combination organic vapor/particulate cartridge for two-stage paints and clearcoats. Fit-test the respirator, and replace cartridges when you can smell solvent through the mask or per the manufacturer's schedule. Provide cross-ventilation and take breaks outside the booth; do not eat, drink, or smoke in the spray area. Skin contact matters too, nitrile gloves and long sleeves reduce absorption and dermatitis.
Local codes, permits, and environmental requirements
Rules for automotive spraying, exhaust discharge, and hazardous waste vary by state, county, and city, and some jurisdictions require a permit or impose limits on spray operations in residential garages. Check with your local building department and fire marshal before you build.
A practical compliance checklist:
- Confirm permit and zoning rules with the building department before construction.
- Confirm fire code requirements (extinguisher, ignition sources, ventilation) with the fire marshal.
- Confirm hazardous waste disposal rules with your local waste authority, solvent rags and paint-laden filters often cannot go in household trash.
- Keep a written record of the rules you were given and the date, in case a neighbor or inspector asks.
- Check with your homeowner's insurance whether a home spray operation affects coverage.
This is the step most DIY guides skip, and it is the one most likely to cost you a fine, a failed inspection, or a denied claim.
DIY Project Car Paint Booth Setup Cost and Budget Breakdown
Costs depend on the size of your booth, the framing you choose, and the fan and filters you buy. Check current prices at your local hardware store or online before you buy. Compare how other owners laid out their workspace by browsing community car builds and the parts their owners documented.
Budget the big items first: the fan, the filters, and the sheeting. A guide to organizing car projects walks through a budget spreadsheet that separates parts and materials. Then add the frame, tape, and safety gear. Keep a receipt log to track your spending.
Pre-Spray Inspection, Teardown, and Finish Troubleshooting
Before you spray, walk the booth. Check for loose tape, gaps in the sheeting, and dust on the floor. Run the fan for several minutes to confirm airflow.
After the job, take the booth down carefully. Dispose of used filters and solvent rags according to local rules.
If the finish comes out with dust nibs, orange peel, or runs, the cause is usually the booth or the prep. Clean the garage floor, wet it down lightly, and check the filters before you try again.
Documenting Your Build and Next Steps with CarJourney
Good records help you track the cost, the materials, and the results of your booth build. Keep photos of the frame, the airflow setup, and the finished paint. A car build documentation guide explains how to keep cleaner records and a build history.
CarJourney gives you one digital garage for your project car. Learn how to create a media-first build profile to publish your finished paint work online. Log your build steps and turn the documented work into a shareable build profile that buyers can trust. Start free and set up your first build today.
Frequently Asked Questions
How to make a homemade paint booth for cars?
Start by choosing a garage area you can seal off, then frame a temporary enclosure with PVC or lumber large enough to walk around the vehicle. Cover the frame with plastic sheeting, leaving one side for a filtered intake and one for exhaust. Add a fan rated for the booth volume, a lighting setup, and a clean floor before spraying. Test airflow with the doors closed to confirm air moves in one direction, away from you and out of the garage.
How big does a paint booth need to be to paint a car?
The booth must allow the vehicle to fit with room to walk around it, usually a few feet of clearance on each side and above the roof for the spray gun and your arms. Measure the car's length, width, and height, then add working clearance on every side. Keep the layout compact enough that the air can circulate across the whole vehicle without dead zones.
What materials do you need for a DIY automotive paint booth?
A typical materials list includes PVC pipe or lumber for the frame, plastic sheeting, duct tape, a box fan or exhaust fan, ducting, intake and exhaust filters, LED work lights, and a respirator rated for paint solvents. Choose materials that stay rigid under the weight of the sheeting and that you can clean or replace easily after each job.
Can you use a garage as a car paint booth?
A garage can work if you enclose a section of it and manage the fire and fumes risk carefully. Clear flammable items, keep ignition sources away, and confirm your local rules allow spray painting at home. Ventilation and filtering matter more than the building itself, so ensure air can exit safely and that overspray is contained.
Start free Add carjourney.io as a preferred source on Google →