 carjourney
Photograph every receipt the day you get it, tag it with your VIN, date, and mileage, then upload it to an AI-backed archive like Carjourney that extracts and timestamps the key fields automatically.
TL;DR
- Minimum viable system: smartphone camera + a cloud folder + a consistent filename pattern (VIN_Date_Mileage_ServiceType)
- What AI extracts: date, mileage, service type, parts replaced, shop name, and invoice totals
- Immediate next step: scan one receipt today and link it to your VIN in Carjourney
- Why it matters: a timestamped, tamper-resistant digital archive is harder to forge than paper and gives buyers instant verification, which industry reports link to resale value lifts of up to 25%
Pro Tip: Photograph the receipt and the odometer on the same day as the service. That pairing is the single habit that makes a maintenance history credible to a skeptical buyer.
Table of Contents
- What tools do you actually need, and how long will this take?
- How to scan maintenance documents: the step-by-step workflow
- How to take images that AI can actually read
- What file names and metadata make records findable later?
- What does AI extract, and how do you catch its mistakes?
- How should you store and back up scanned records?
- How do you handle faded, handwritten, or incomplete records?
- How long does this actually take, and what does it cost?
- Key Takeaways
- Why a verified digital history changes the conversation at sale time
- Carjourney makes the backlog disappear faster
- Useful sources
What tools do you actually need, and how long will this take?
You need less than you think. A smartphone and a free cloud folder are enough to get started. The question is how much manual work you want to do afterward.

Minimum toolkit: smartphone camera, Google Drive or iCloud folder, a consistent filename convention.
Recommended toolkit: a scanning app with auto-crop and OCR (Adobe Scan, Microsoft Lens, or Apple’s built-in document scanner), an optional flatbed scanner for thick multi-page service books, and Carjourney for automated AI extraction and VIN association.
| Capture method | Speed per page | Pros | Cons |
|---|---|---|---|
| Smartphone camera | 20–40 seconds | Always with you, no extra app | Manual cropping, no OCR |
| Scanning app (OCR) | 30–60 seconds | Auto-crop, text extraction, PDF output | Needs decent lighting |
| Flatbed scanner | 60–90 seconds | Best quality for thick books | Not portable, slower |
Time to expect:
- Single receipt at a service visit: 20–60 seconds
- Full backlog for one vehicle (50–150 documents): 1–4 hours depending on record volume and condition
- Ongoing capture after each visit: 2–3 minutes
How to scan maintenance documents: the step-by-step workflow
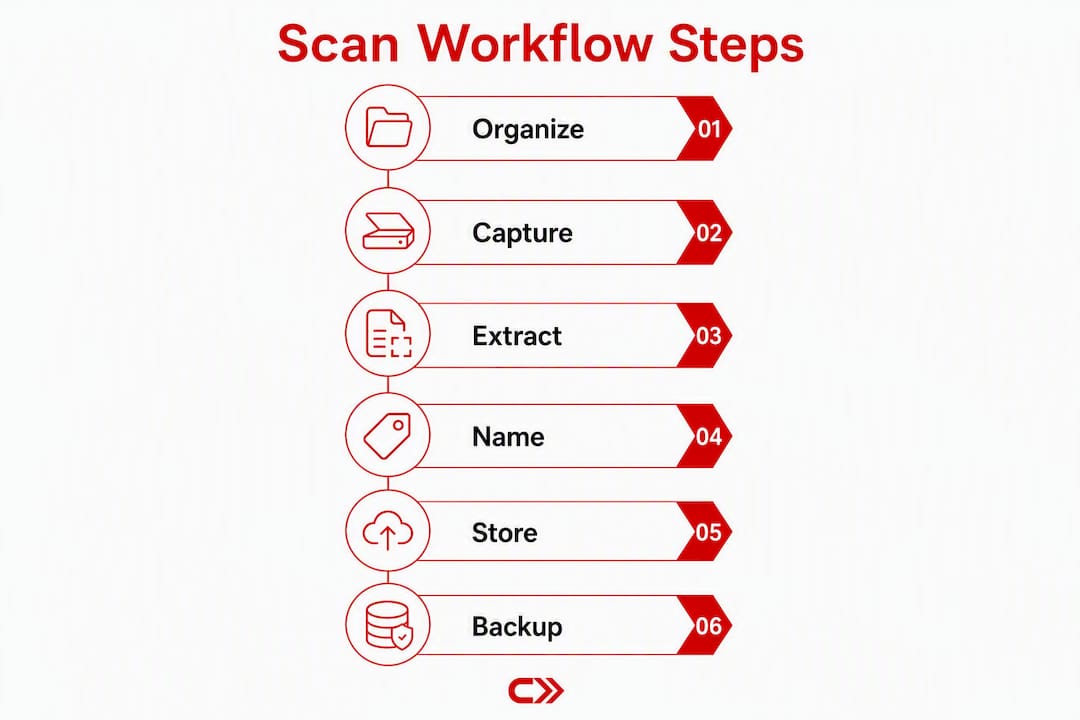
Follow these steps in order the first time. After that, steps 1–4 become a two-minute habit after every service visit.
- Gather all documents. Pull every receipt, shop invoice, parts order, warranty card, and modification log. Include dealer printouts, handwritten oil-change slips, and any emissions or inspection certificates.
- Capture images. Photograph or scan each document. For multi-page invoices, scan as a single multi-page PDF or group the images in one folder labeled by visit date. Photograph the odometer at the same time.
- Upload to cloud or Carjourney. Drop files into your cloud folder or upload directly to Carjourney, which automatically links each document to your vehicle profile and timestamps the entry.
- Review AI-extracted fields. Check the date, mileage, service description, parts, and totals the AI pulled. Correct anything that looks off — smeared ink and handwriting are the most common failure points.
- Add tags. Apply your VIN, vehicle nickname, shop name, and service category (routine, major repair, DIY, modification).
- Set reminders. Use the extracted service interval or mileage to trigger a reminder for the next visit.
- Export or share for resale. Generate a read-only link or a single-page service summary rather than emailing raw receipts.
Required metadata to capture at each visit:
- Odometer reading (photo preferred)
- Invoice total and line items
- Shop name and technician initials
- Parts replaced (part numbers if available)
How to take images that AI can actually read
Good capture equals good extraction. A blurry or shadowed photo forces manual correction on every field, which defeats the purpose of AI scanning.
Lighting: diffuse daylight near a window or indirect LED is ideal. Avoid direct sunlight, which creates harsh shadows across text. Never use your phone’s flash directly on glossy thermal paper receipts — it washes out the ink.
Flatness and angle: lay the document completely flat. Hold the phone directly above it, parallel to the surface. Most scanning apps show a grid overlay; use it to align edges before shooting.
Resolution: shoot at your phone’s default camera resolution. That is more than enough for OCR. Keep file sizes reasonable by using JPEG for single pages and PDF for multi-page documents.
Pro Tip: Place a white index card behind small or thin receipts before photographing. It gives the OCR engine a clean, high-contrast background and cuts extraction errors on faded thermal paper.
- Capture both sides of any document that has writing on the back
- For old parts you replaced, photograph the part number label before discarding it
- If a receipt is torn or partially missing, photograph what exists and add a manual note explaining the gap
The Liberty CDJR service appointment checklist is a useful model for what to request and photograph at a dealer visit — odometer photo, shop stamp, and itemized parts receipts are the three non-negotiables.
What file names and metadata make records findable later?
Use a consistent filename standard from day one: VIN_Date_Mileage_ServiceType_Shop.ext
Three examples:
1HGCM82633A123456_2024-03-15_47200_OilChange_QuickLube.pdf1HGCM82633A123456_2024-07-02_51800_BrakesPads_MikesMechanic.jpg1HGCM82633A123456_2025-01-10_58400_TimingBelt_DealerService.pdf
| Metadata field | Example value | Where it lives |
|---|---|---|
| VIN | 1HGCM82633A123456 | Filename, file properties, Carjourney profile |
| Date | 2024-03-15 | Filename, EXIF data, Carjourney record |
| Mileage | 47,200 | Filename, Carjourney extracted field |
| Service type | Oil Change | Filename, tag, Carjourney category |
| Shop | QuickLube | Filename, Carjourney shop field |
| Parts | Mobil 1 5W-30, OEM filter | Carjourney parts field, manual note |
| Cost | $67.50 | Carjourney invoice total field |
Tagging strategy for non-app workflows: create one cloud folder per VIN, with subfolders by year. Within each year folder, use subfolders for Routine, Major Repair, DIY, and Modifications. That structure lets you hand a buyer a single folder link and have it read as a coherent history.
What does AI extract, and how do you catch its mistakes?
AI extraction pulls dates, mileage, service descriptions, part names, and invoice totals from uploaded images. The process is fast, but it needs a quick human pass before you trust the output.
Modern systems combine OCR with automotive repair knowledge bases to convert free-text receipts into structured records. Enterprise-grade implementations demonstrate how vision-language AI can extract repair-order fields including fault descriptions, recommended services, and parts — the same approach Carjourney applies to consumer receipts.
Common extraction errors and fixes:
| Error type | Cause | Fix |
|---|---|---|
| Wrong date | Faded or handwritten date | Re-capture with better lighting; enter manually |
| Mileage misread | Small font, smeared ink | Crop tightly to the mileage line; correct in UI |
| Missing line items | Multi-column invoice layout | Upload as PDF; add missing parts manually |
| Garbled shop name | Rotated or skewed text | Straighten before uploading; correct in UI |
Trust signals to look for in any AI scanning tool:
- Extraction confidence scores shown per field
- Timestamped archive with an immutable creation date
- Edit history or audit trail showing who changed what and when
- Verified VIN association so records cannot be accidentally mixed between vehicles
Carjourney shows confidence scores alongside extracted fields and logs every manual correction, so the record reflects both what the AI read and what you verified.
How should you store and back up scanned records?
Store a primary copy in a trustworthy cloud archive, keep a secondary backup, and export periodically.
Backup checklist:
- Primary: Carjourney cloud archive or a dedicated cloud folder (Google Drive, iCloud, Dropbox)
- Secondary: periodic ZIP export saved to a second cloud account or a local encrypted drive
- Export formats to keep: PDF for human-readable records, CSV for metadata and mileage logs
Sharing for resale: generate a read-only link or a single-page service summary. Avoid emailing raw receipts that contain your home address, phone number, or credit card digits. Redact personal identity information before sharing anything publicly.
| Storage layer | Purpose | Format |
|---|---|---|
| Carjourney archive | Primary, AI-searchable, VIN-linked | App-native + PDF export |
| Cloud folder (Drive/iCloud) | Secondary redundancy | PDF, JPEG |
| Local encrypted drive | Offline backup | ZIP archive |
| Read-only share link | Resale sharing | PDF summary or app link |
Security basics: enable two-factor authentication on every account that holds vehicle records. Use a unique password for each service. Digital records are harder to tamper with than paper service books, but only if the account holding them is properly secured.
How do you handle faded, handwritten, or incomplete records?
Imperfect records are still worth documenting. A partial receipt with a date and shop name is more credible than a gap in the timeline.
- Photograph both sides of any handwritten slip, even if the ink is light
- Use your scanning app’s contrast or brightness adjustment before capturing faded thermal paper
- Add a manual note in the record: who performed the work, what was done, and any context you remember
- Attach a photo of the old part or the odometer reading as corroborating evidence
- Label the record clearly as “owner-reported” rather than “shop invoice” — buyers respect honesty about provenance more than a suspiciously clean history
Pro Tip: For very faded receipts, photograph under a bright indirect light source and then invert the image briefly in your phone’s photo editor to check whether hidden text becomes visible. If it does, use that enhanced version for OCR.
Any timestamped evidence is better than none. A photo of an old oil filter with a date-stamped image proves the work happened, even without a formal receipt.
How long does this actually take, and what does it cost?
A tidy backlog for one vehicle typically takes 1–4 hours. Ongoing capture after each service visit runs 2–3 minutes.
Batching strategies:
- By year: clear one year’s worth of receipts per session
- By service type: do all oil changes first, then brakes, then tires — faster to verify because the fields are similar
- By shop visit: group everything from one visit into a single PDF before uploading
A focused two-hour session can clear 50–150 receipts for most vehicles. If you have a heavily modified car with years of parts orders, budget closer to 3–4 hours for the first pass.
Cost considerations:
- Time: the main investment, especially for the initial backlog
- Carjourney free plan: covers basic scanning and a limited number of vehicles
- Carjourney Pro: unlocks unlimited vehicles, unlimited AI scans, and automatic VIN linking — worth it if you own multiple vehicles or want reminders and resale-ready exports without manual work
- Flatbed scanning service (FedEx Office, UPS Store): useful for very large archives or fragile service books you do not want to handle repeatedly
For a single-vehicle owner with a moderate backlog, the free plan plus one focused session covers most needs. The Pro plan pays for itself quickly if you are preparing a vehicle for sale and want a verified, shareable history.
Key Takeaways
Scanning your vehicle’s maintenance documents is a one-time backlog effort plus a two-minute habit after every service visit, and the payoff at resale is a verifiable history that buyers trust.
| Point | Details |
|---|---|
| Capture on the day | Photograph every receipt and the odometer the same day as the service visit. |
| Use a consistent filename | Follow VIN_Date_Mileage_ServiceType_Shop.ext so records stay findable without an app. |
| Verify AI-extracted fields | Always check date, mileage, and parts after upload; correct errors before saving. |
| Keep a redundant backup | Store records in Carjourney plus a secondary cloud folder or encrypted local drive. |
| Share a read-only link when selling | A single-page service summary or read-only archive link builds buyer confidence and supports resale value. |
Why a verified digital history changes the conversation at sale time
There is a version of selling a car where the buyer asks for service records and you hand them a folder of originals, hoping they believe you. Then there is the version where you send a link, they open a timestamped archive tied to the VIN, and the conversation moves straight to price.
The difference is not just convenience. Verified, timestamped records are structurally harder to fake than paper, and buyers who have been burned by odometer fraud or missing service gaps know it. A complete digital history removes the uncertainty that drives lowball offers. Industry reports put the resale lift from a full, verifiable service history at up to 25%. The absence of records almost always costs you something.
What most owners underestimate is how little effort the ongoing habit requires once the backlog is cleared. Two minutes per visit, a consistent filename, and a cloud backup. The hard part is the first session. After that, it runs on autopilot.
Carjourney makes the backlog disappear faster
Most car owners have the same problem: a glove box full of receipts, no system, and a sale coming up where those records suddenly matter. Carjourney was built specifically for that gap.
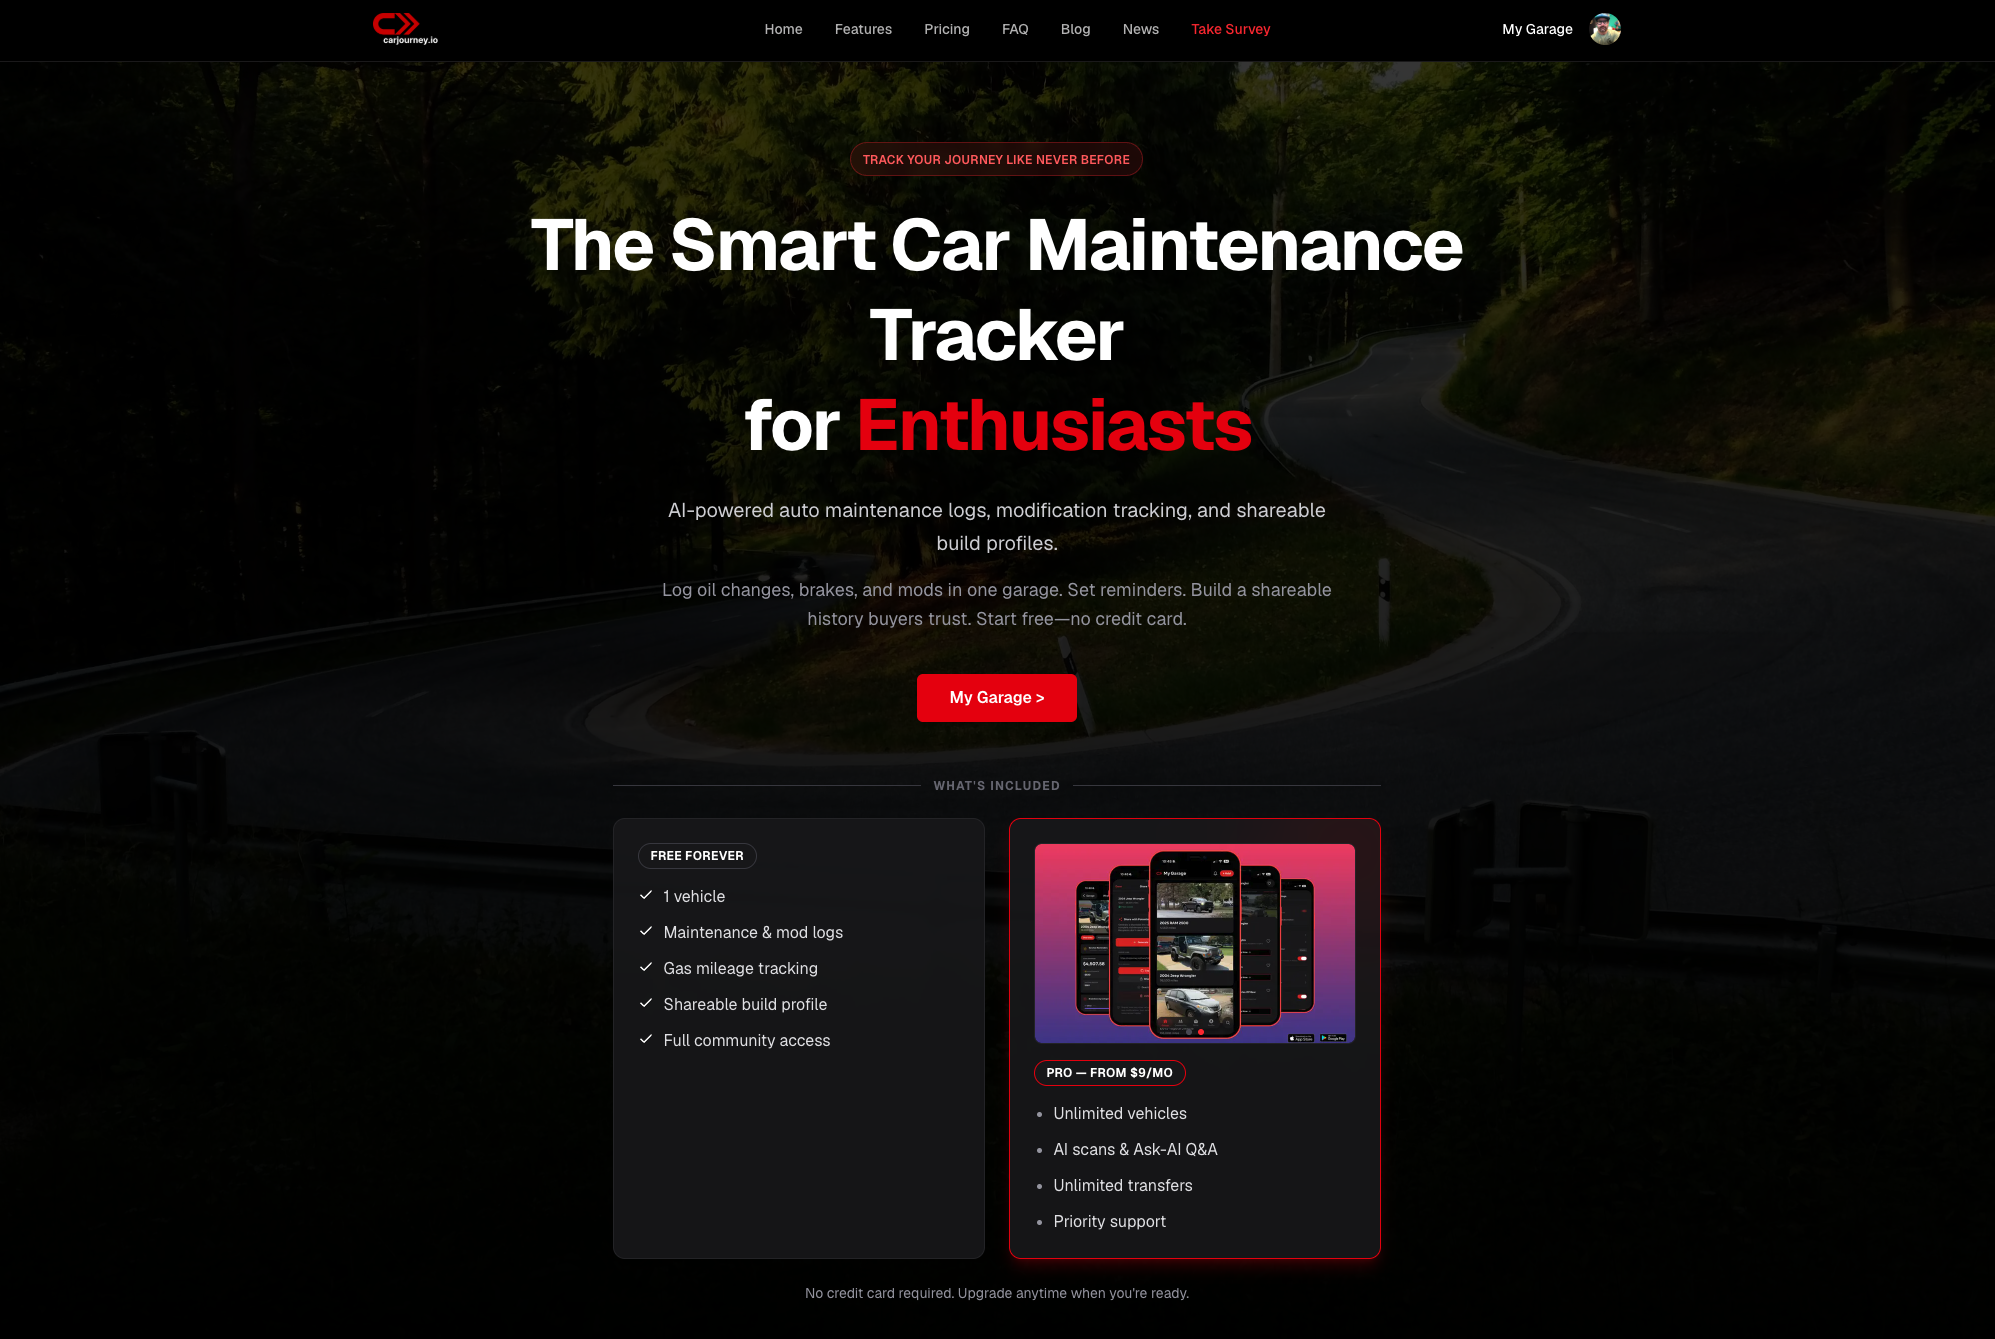
Upload a photo of any receipt and Carjourney’s AI extracts the date, mileage, service type, parts, and shop name, then links the record permanently to your vehicle’s profile. Every entry is timestamped. Every correction is logged. When you are ready to sell, you generate a read-only share link instead of emailing a pile of JPEGs.
The free plan covers basic scanning and a single vehicle. The Pro subscription unlocks unlimited vehicles, unlimited AI scans, automatic VIN linking, service reminders, and exportable histories. Pricing details are at carjourney.io.
Add your VIN, photograph one receipt, and let the AI do the first extraction. That is the whole starting point.
Useful sources
- How to Scan Repair Receipts Without Losing Records — Carjourney’s practical walkthrough on capturing receipts and maintaining long-term record integrity
- How to Organize Car Service Records for Any Car Owner — guidance on assembling a complete digital service history organized by VIN
- Cloud-Based Vehicle Records That Protect Your Build — details on secure, timestamped cloud storage for vehicle records
- Car Service History: Digital Records & Resale Value — Stoneacre (UK) on why digital records reduce forgery risk and improve buyer confidence (note: UK market context)
- Service Department Appointment Checklist for Car Owners — Liberty CDJR’s checklist model for what to document and photograph at a dealer service visit