
 carjourney
Vehicle Documentation Photography: Your Complete Owner's Guide
Vehicle Documentation Photography: Your Complete Owner’s Guide
Vehicle documentation photography is the primary way owners prove condition, mileage, repairs, and modifications. A well-organized photo record reduces buyer uncertainty, speeds insurance claims, and protects you in shop disputes before they escalate. Start a consistent 20-photo workflow: wide, medium, and close shots for each area, plus your VIN plate, odometer reading, and service receipts, with date and mileage captured every session.
Key Takeaways
A complete, date-stamped 20–30 photo record with VIN, odometer, and captioned receipts is the most effective way to prove condition, support a sale price, and win a dispute.
| Point | Details |
|---|---|
| VIN and odometer first | Make these the mandatory first two shots of every session — they anchor the entire record. |
| Three-angle method | Shoot wide, medium, and close for every item; this turns photos into usable evidence. |
| 20–30 photos per session | A complete gallery of roughly 20 photos attracts more inquiries and supports asking price. |
| Local and cloud backup | Keep one private unredacted archive for claims and one redacted copy for public sharing. |
| Carjourney for verified records | Carjourney links photos to receipts via AI scanning and generates shareable build profiles buyers trust. |
Table of Contents
- Why vehicle documentation photography matters for owners
- The essential shot list every owner should capture
- How to take clear, consistent photos
- How to organize and store photos so they stay useful
- How to present photos for sale, maintenance records, and insurance
- Common mistakes owners make when photographing their cars
- Example shot list and gallery order you can follow every session
- How a verified record platform strengthens your photo workflow
- What good documentation actually looks like in practice
- Carjourney makes your vehicle photo record portable and verifiable
- Sources
Why vehicle documentation photography matters for owners
The role of vehicle photography goes well beyond listing photos. A documented car is a verifiable car, and that distinction has real financial consequences.
For resale, a complete, well-lit gallery of roughly 20 photos attracts more serious inquiries and tends to support your asking price. Buyers treat undocumented builds as a mystery box and discount accordingly. Project cars with a build sheet, receipts, and invoices sell faster and for higher prices because documentation removes the uncertainty a buyer would otherwise price in.
For maintenance and shop disputes, date-stamped before photos are your strongest evidence. If a shop returns your car with a new scratch, a photo taken the morning of drop-off ends the argument. The same logic applies to modifications: a photo of the suspension before and after a lift kit, with the invoice in the same folder, tells the whole story.
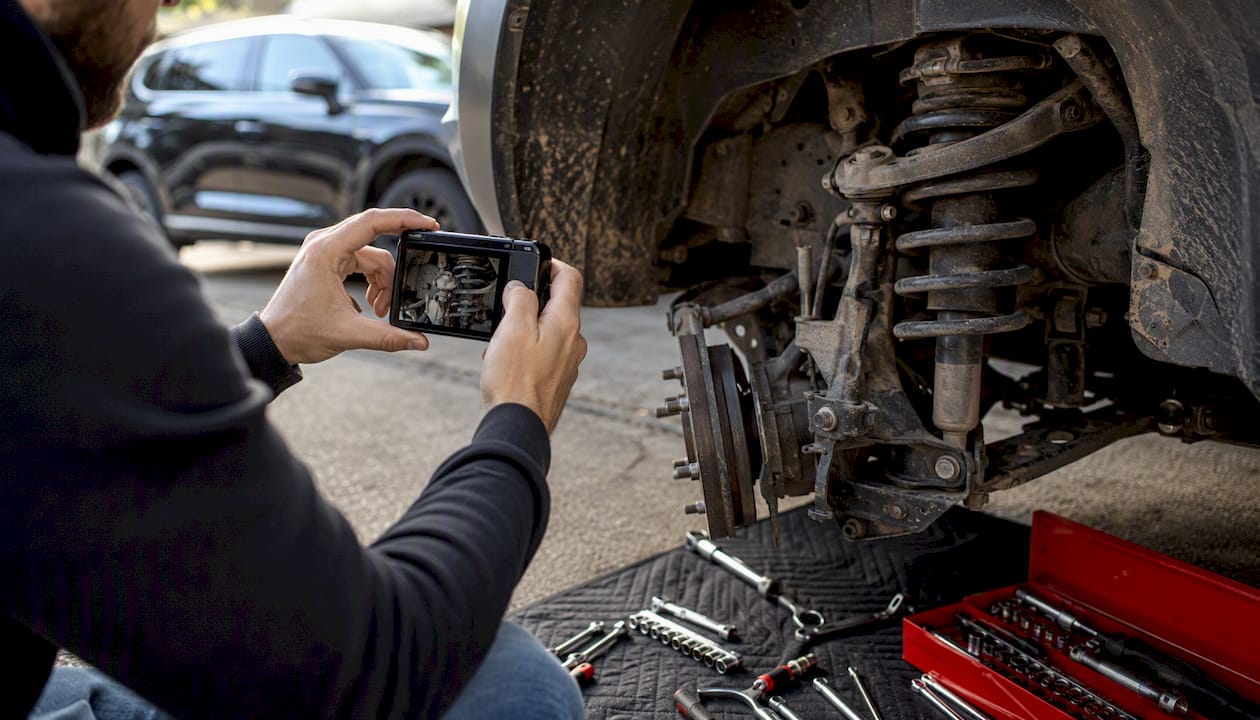
For insurance and theft, baseline photos speed claims and recovery. A clear VIN shot, photos of unique modifications, and a dated exterior record give your insurer and law enforcement something concrete to work with.
Keeping a 20–30 photo baseline and refreshing it annually, or after any significant event, protects you from disputes during storage, transport, or service visits. The service history buyers expect is not just receipts — it is receipts paired with photos.
The essential shot list every owner should capture
A complete session covers eight categories. Work through them in order so nothing gets skipped.
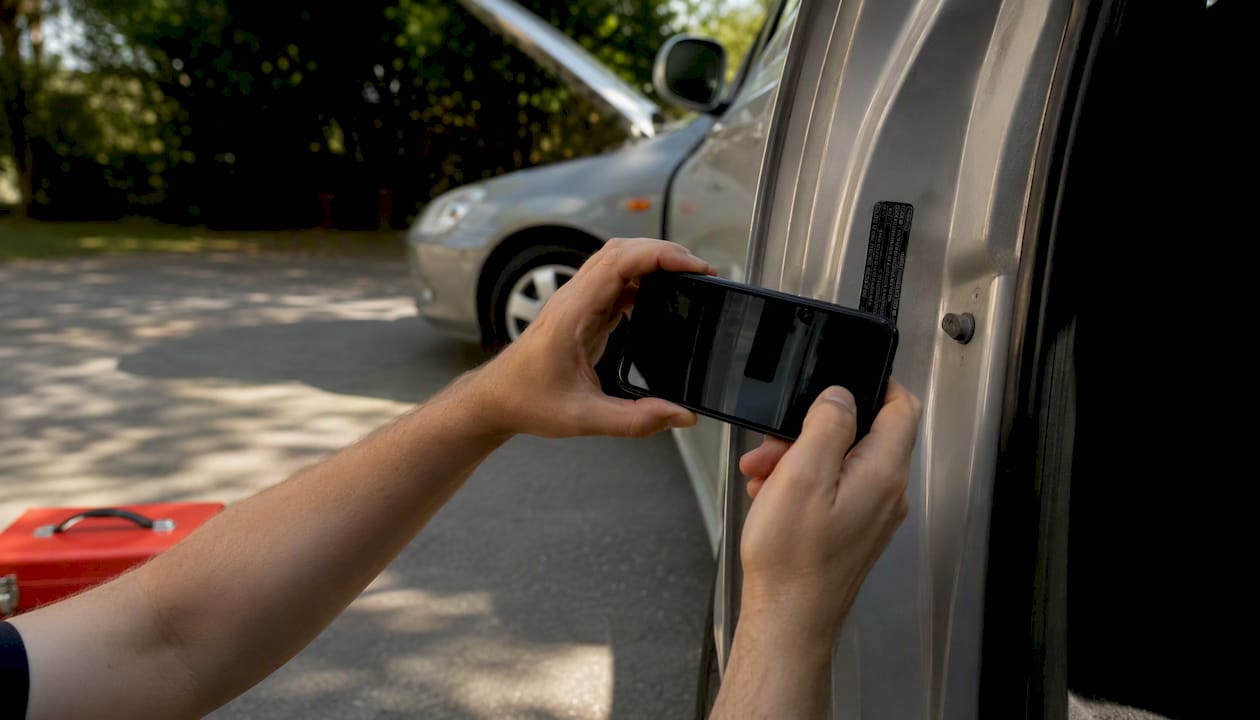
- VIN and data plates — dashboard VIN strip, door-jamb sticker, and engine/build tag. These are mandatory first shots. Shoot close enough that every character is legible without zooming in on the final image.
- Odometer — instrument cluster with current mileage clearly visible. This is your timestamp anchor for the entire session.
- Hero exterior shots — front three-quarter and rear three-quarter, both full profiles, straight-on front and rear. Six shots minimum.
- Wheels and tires — one shot per wheel showing the full face, plus a close-up of tread depth. Place a quarter in the tread groove as a size reference for wear documentation.
- Engine bay — wide shot of the full bay, medium shot of major components, close-up of any stamps or identifying marks.
- Undercarriage — key areas if accessible: frame rails, welds, rust spots, and any repair patches.
- Interior — driver’s seat, rear seats, dashboard, trunk or cargo area, and all included keys and accessories.
- Damage and wear close-ups — every blemish gets its own shot with a size reference and a caption.
For documentation, fan out the title, registration, and recent service receipts for a wide shot, then photograph each document individually close enough to read. Photographing upgrades follows the same three-category logic: wide for context, medium for identification, close for detail.
- Bring a Trailer’s photography guidelines require current, unaltered photos with explicit VIN and blemish documentation — no AI-generated or heavily filtered images permitted.
- Aim for 20–30 total photos per session, broken down by the categories above.
How to take clear, consistent photos
Good documentation photography is about repeatability, not artistry. These techniques work with any smartphone made in the last four years.
- Light first. Shoot in open shade or on an overcast day. Harsh direct sun creates blown highlights and deep shadows that hide exactly what you are trying to show. Skip the flash entirely — it flattens texture and creates glare on paint and glass. Open shade and no-flash are the two most impactful technique choices you can make.
- Prep your camera. Clean the lens with a microfiber cloth. Shoot at native resolution. Tap the screen to lock focus and exposure on the subject before pressing the shutter.
- Use the three-angle method. For every item — a wheel, a repair, a modification — shoot wide for context, medium for identification, and close for detail. This three-angle evidence approach is the same method dealer inspection workflows use because it makes photos function as undeniable evidence.
- Kneel for level shots. Camera at wheel-center height gives you a natural, proportional view of the car. Shooting from standing height distorts the roofline and makes the car look smaller.
- Capture odometer and date. Photograph the instrument cluster at the start of every session. Your phone’s EXIF timestamp is a secondary record; the odometer reading in the photo is the primary one.
- Shoot VIN plates legibly. Change your angle until glare disappears. Every character must be readable without pinching to zoom.
Pro Tip: Bring a small LED inspection light for engine bays and undercarriage shots. Ambient light rarely reaches far enough, and a single LED panel eliminates shadows that would otherwise hide the details you most need to document.
- Avoid portrait mode for documentation shots — shallow depth of field can blur the edges of a VIN plate or tread pattern.
- Retake any image that is not sharp at full resolution before you move on. Blurry evidence is no evidence.
How to organize and store photos so they stay useful
Raw photos dumped into a camera roll become useless within months. A simple folder structure and a short caption template fix that.
Store photos by vehicle, then year, then event: 2026-05-12_service or 2026-03-01_pre-storage. Include mileage in the folder name or the caption. This naming convention means you can find any session in seconds without opening every image.
Caption template: [Date] | [Mileage] | [What] | [Why] — for example, “2026-05-12 | 47,200 mi | Front brake rotor | Pre-shop baseline before pad replacement.” Short, searchable, and self-explanatory to anyone reading it later.
Keep original photo timestamps intact. Do not re-export or re-save photos in a way that strips metadata — that timestamp is part of your evidence chain. For vehicle document storage, keep at least one cloud backup and one local copy.
Pro Tip: Before sharing any photos publicly in a listing, redact or crop out your license plate, home address on any documents, and any personal ID fields. Keep the unredacted originals in a private folder for insurance or legal use. Number plate images carry cloning risks that most owners underestimate.
- Workflow sequence: intake (odometer + VIN + overview) → inspection (three-angle shots per item) → annotate (caption + mileage) → backup → share link.
How to present photos for sale, maintenance records, and insurance
The order of your gallery tells a story. Get the order wrong and buyers lose confidence before they reach the good photos.
For a sale listing: Start with your best hero shot (front three-quarter in good light), then full profiles, wheels, interior, engine bay, VIN, damage close-ups, and documentation last. Updating service records before listing and pairing them with photos in the same gallery is what separates a trustworthy listing from a generic one.
For maintenance records: Organize chronologically in before-and-after pairs. Link each repair recommendation to its photo. Keep the invoice in the same folder as the photos from that session. Documenting recent repairs this way gives you a clear record if a shop dispute arises later.
For insurance and claims: Lead with baseline photos (date-stamped, pre-event), then the event photos showing new damage. Include VIN and proof of ownership in the same submission folder.
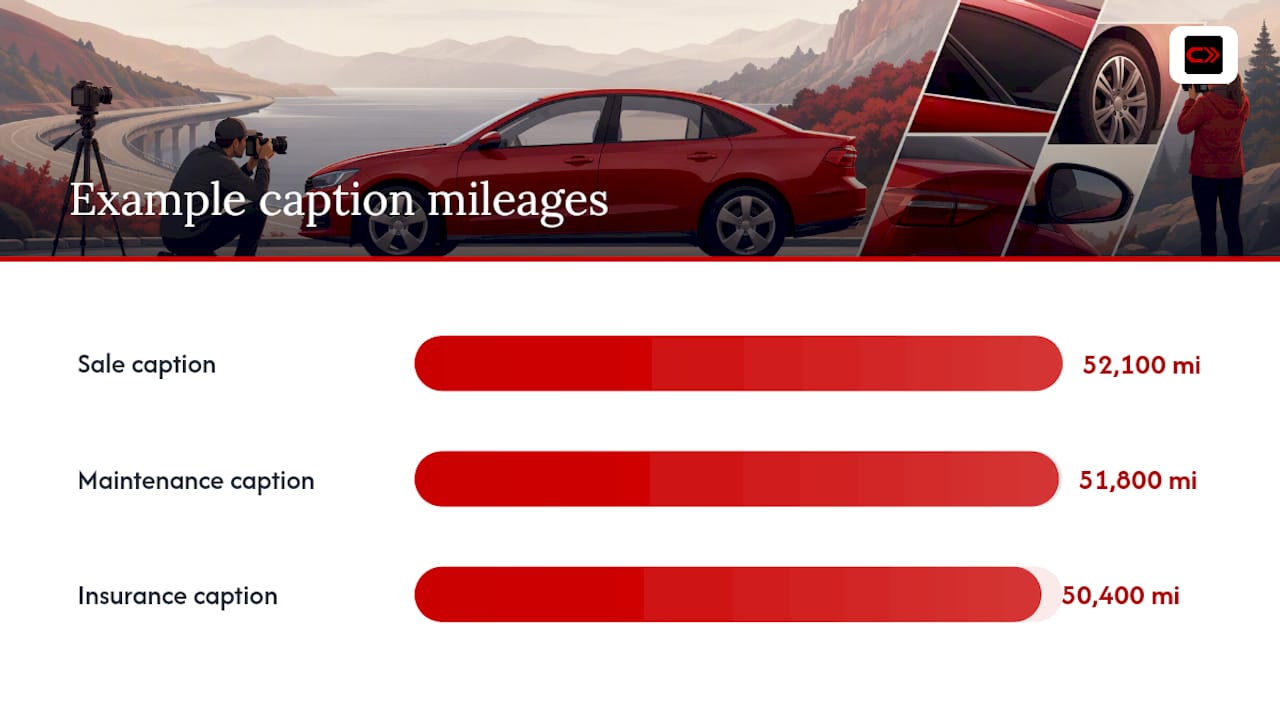
Caption formats by use-case:
- Sale: “2026-04-10 | 52,100 mi | Driver door | 2-inch scuff, no primer showing — disclosed”
- Maintenance: “2026-03-15 | 51,800 mi | Front strut | Pre-replacement — original hardware intact”
- Insurance: “2026-01-20 | 50,400 mi | Rear quarter panel | Pre-storage baseline — no damage”
Common mistakes owners make when photographing their cars
- Too many uncaptioned photos. A folder of 200 unlabeled images is harder to use than 25 captioned ones. Apply the caption template to every session.
- Missing VIN or odometer shot. Make these the mandatory first two photos of every session, no exceptions. Without them, the rest of the record has no anchor.
- AI-generated or altered images. Platforms like Bring a Trailer explicitly prohibit AI or heavily altered images in listings. Beyond policy, altered photos destroy the evidentiary value of your record. Use only original, unaltered images for documentation and sale.
- Poor lighting and glare. Shooting in direct sun or using flash creates reflections that obscure paint condition and panel gaps. Move to shade.
- Exposing personal data. License plates, addresses on documents, and VIN numbers in public listings can be misused. Redact before sharing.
Pro Tip: If you are unsure whether a photo is sharp enough, view it at 100% on a laptop or desktop screen before the session ends. A photo that looks fine on a phone screen often reveals blur at full resolution.
Example shot list and gallery order you can follow every session
Work through this sequence in one session and you will have a complete, organized record.
- VIN plate (dashboard strip)
- VIN plate (door jamb)
- Engine/build tag
- Odometer cluster (current mileage)
- Front three-quarter
- Rear three-quarter
- Driver-side profile
- Passenger-side profile
- Straight-on front
- Straight-on rear
- Front-left wheel and tread
- Front-right wheel and tread
- Rear-left wheel and tread
- Rear-right wheel and tread
- Engine bay wide
- Engine bay medium (major components)
- Engine bay close (stamps or marks)
- Interior: driver’s seat and dashboard
- Interior: rear seats
- Trunk or cargo area
- Keys and included accessories
- Undercarriage (frame rails, welds, rust)
- Documentation fan (title, registration, receipts)
- Individual document close-ups
- Damage close-ups (one per blemish, with size reference)
That is a 20–25 photo baseline. Add shots for major repairs, modifications, or pre-storage condition checks. Automotive Addicts recommends starting documentation before the first bolt is removed on a restoration — the same principle applies to any significant modification.
How a verified record platform strengthens your photo workflow
A photo folder on your phone is a start. A verified, shareable record is what actually reduces buyer risk and holds up in a dispute.
The workflow looks like this: capture photos using the shot list above, annotate with date and mileage captions, upload to a platform that extracts VIN and receipt data automatically, store in secure cloud with a private archive, then share a read-only build profile with buyers or insurers.
- AI document scanning pulls part numbers, dates, and mileage from receipts so you are not retyping data manually.
- Shareable build profiles let buyers see the full record without accessing your private files.
- Private vs. public sharing means your unredacted documents stay locked while buyers see only what you choose to show.
- Linking each service record to its corresponding photos creates the before-and-after pairs that matter most in disputes.
Pro Tip: Use the platform’s redaction tools before generating any share link. A buyer needs to see your brake job invoice — they do not need your home address printed on it.
What good documentation actually looks like in practice
The cars that sell quickly and at asking price are not always the cleanest or the most modified. They are the ones where the seller clearly knew their vehicle. Starting before the first bolt comes off, photographing the factory VIN tags and original hardware, keeping every receipt in one place — that discipline reads as confidence to a buyer, and confidence is contagious.
A single before-photo taken the morning of a shop visit has resolved disputes that would otherwise have cost hundreds of dollars and weeks of back-and-forth. The photo did not need to be beautiful. It needed to be dated, sharp, and show the panel in question. That is the entire job.
Carjourney makes your vehicle photo record portable and verifiable
Every photo you take is only as useful as your ability to find, share, and prove it. Carjourney turns a folder of images into a structured, shareable vehicle résumé — with AI document scanning that extracts mileage and part data from receipts, cloud storage with private and public sharing controls, and build profiles buyers can review without you forwarding a single file.
The intake workflow takes minutes: upload your session photos, add mileage, and let the AI link receipts to the corresponding service events. Your private archive stays locked; your share link shows only what you approve. For enthusiasts preparing a sale or protecting a build, that separation matters. Start your vehicle record on Carjourney and have a verified, shareable profile ready before your next listing goes live.
Sources
- Bring a Trailer — Photography guide
- Capital One Cars — How to take better photos for your used-car listing
- Dr. Vin — How to photograph your car to maximize sale price
- GarageFlip — Project car build sheet guide
- Personal Car Photo Records: Annual documentation for owners (2026)