 carjourney
From the CarJourney journal
How to Troubleshoot Vehicle Issues: A Beginner's Guide

How to Troubleshoot Vehicle Issues: A Beginner’s Guide
The fastest way to troubleshoot vehicle issues is to work in order: observe the symptom precisely, inspect visually, check basic systems, then confirm with a diagnostic tool. Skip that sequence and you’re guessing. Most car problems that end up costing owners a fortune started as something a careful look under the hood would have caught.
Here’s the core process before you touch a single tool:
- Document the symptom exactly. Note what the car does, when it happens, and under what conditions (cold start, highway speed, turning, braking). Vague descriptions lead to vague repairs.
- Do a visual walk-around. Look for fluid puddles under the car, fluid leaks from brake, oil, coolant, or steering systems, damaged wiring, and anything that looks out of place.
- Check warning lights. Don’t ignore them. A steady check engine light is different from a flashing one. The flashing version means stop driving now.
- Test basic systems first. Battery, fluid levels, fuses. These take five minutes and rule out the most common culprits.
- Use an OBD-II scanner to confirm, not to start. Plugging in a scanner before you’ve looked at anything is how people replace perfectly good parts.
Pro Tip: Record a short video or audio clip of the symptom while it’s happening. Automotive expert Claude Townsend, program coordinator at Oakland Community College, says a mechanic who can hear the actual noise cuts out significant guesswork compared to a verbal description.
How do you troubleshoot common car problems step by step?
A systematic diagnostic approach starts with verifying the exact complaint before anything else. Not with a scanner. Not with a parts swap. With your eyes, ears, and a few direct questions: What exactly is happening? When does it occur? Does it change with temperature, speed, or load? Getting that right is the difference between a clean repair and a comeback.

Step 1: Verify and document the complaint
Write down every detail. Does the problem happen at cold start or after the engine warms up? Under acceleration or at idle? On bumpy roads or smooth ones? The more specific you are, the faster a mechanic or your own diagnosis will zero in on the cause. A vague symptom description produces a vague repair.
Step 2: Perform a thorough [optical inspection of your tractor](https://pexlivanidis.com/optiki-epitheorisi-trakter-odigos-di- adikasias)
Walk around the car. Check underneath for puddles. Look at hoses, belts, and wiring for cracking, fraying, or disconnection. Check for aftermarket modifications that might have introduced a problem. Prior repairs that weren’t done correctly show up here too.
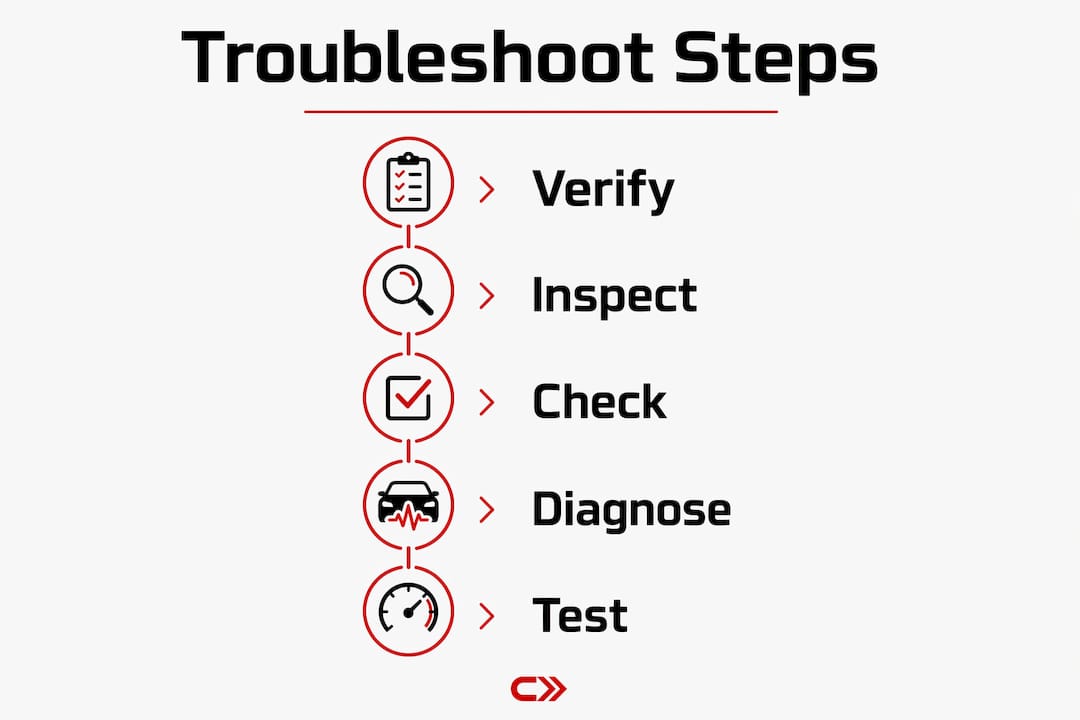
Step 3: Check basic systems
Battery terminals should be clean and tight. Fluid levels (oil, coolant, brake fluid, transmission fluid) should be within range. A discharged or corroded battery is one of the most common causes of a no-start condition, and it takes two minutes to check.

Step 4: Use diagnostic tools to confirm
An OBD-II scanner reads diagnostic trouble codes (DTCs) stored by the car’s computer. These codes point to affected systems, not specific failed parts. A P0300 code means random misfire; it does not tell you whether the cause is a bad spark plug, a failing coil, or a vacuum leak. Use the code as a starting point for targeted physical inspection, not as a parts-ordering list.
Step 5: Test under different conditions
Some problems only appear under load, at operating temperature, or at specific speeds. If the symptom doesn’t show up at idle in your driveway, replicate the conditions where it does. Cold-start issues often disappear once the engine warms up, which narrows the cause considerably.
| Symptom | First checks | Likely causes |
|---|---|---|
| Won’t start (no crank) | Battery voltage, terminal connections | Dead battery, bad ground, starter relay |
| Won’t start (cranks, no fire) | Spark plugs, fuel pump audible prime | Ignition system, fuel delivery fault |
| Overheating | Coolant level, radiator hoses, thermostat | Low coolant, stuck thermostat, failed water pump |
| Rough idle | MAF sensor, vacuum lines, spark plugs | Vacuum leak, dirty MAF, misfiring cylinder |
| Stalling | Air intake, fuel filter, oxygen sensors | Clogged filter, faulty sensor, fuel pressure drop |
| Brake noise | Pad thickness, rotor surface condition | Worn pads, warped rotors, debris |
| Vibration at speed | Tire balance, lug nuts, driveshaft | Unbalanced tires, worn CV joint |
How do you check a car’s electrical system yourself?
Electrical faults are responsible for a surprisingly wide range of symptoms, from a dead battery to malfunctioning power windows to lights that flicker for no obvious reason. The good news is that most simple electrical problems trace back to blown fuses or wiring issues rather than failed modules or computers. Checking fuses and wiring integrity is always the right first step before assuming a component has failed.
Start with the fuse boxes. Most vehicles have two: one under the hood and one inside the cabin, usually near the driver’s knee. Pull the fuse for the circuit that’s misbehaving and hold it up to the light. A blown fuse has a visibly broken wire inside. Replace it with the same amperage rating. If it blows again immediately, there’s a short in that circuit.
Common electrical symptoms and what to check first:
- Dead battery after sitting overnight: Test for a parasitic draw with a multimeter set to measure amperage. Any draw above 50mA suggests a circuit is staying active when it shouldn’t be.
- Lights flickering or dimming: Check battery voltage (should be 12.4–12.6V at rest) and alternator output (13.5–14.5V with engine running).
- Power windows or locks not working: Check the fuse first, then the relay. If both are fine, inspect the wiring harness at the door hinge where wires flex and can break.
- No crank when you turn the key: Could be a blown fuse, a bad starter relay, or a corroded ground connection at the battery or chassis.
Pro Tip: A multimeter is the single most useful tool for electrical diagnosis. Test for voltage drop across a circuit by measuring voltage at the source and at the load. A drop of more than 0.5V in a ground circuit usually indicates a bad connection or corroded terminal.
Wiring harness damage is easy to miss. Look for bare spots, melted insulation, or connectors that have been pulled apart and pushed back together without locking. Corrosion at connector pins is a frequent cause of intermittent faults that are maddening to track down. Spray electrical contact cleaner on suspect connectors and reseat them firmly.
When should you stop troubleshooting and call a mechanic?
Some symptoms mean pull over now. Others mean schedule an appointment this week. Knowing the difference keeps you safe and keeps a manageable problem from becoming an expensive one.
Three conditions require you to stop driving immediately:
- A flashing check engine light. This signals an active misfire happening in real time. Continued driving can destroy the catalytic converter, turning a $200 repair into a $1,500 one.
- The temperature gauge rising above normal. Driving an overheating engine risks warping the cylinder head or cracking the block. Pull over, turn off the engine, and let it cool before checking coolant.
- White or blue smoke from the exhaust on a warm engine, or a burning smell. White smoke on a warm engine usually means coolant is burning inside the combustion chamber. Blue smoke means oil. Either one points to internal engine damage that gets worse with every mile.
Beyond those emergencies, there are situations where DIY diagnosis hits a wall. Modern vehicles use Controller Area Network (CAN) bus communication between modules, and faults in that network require professional-grade scan tools and software to interpret accurately. Advanced driver assistance systems (ADAS) like lane-keeping and automatic braking require calibration after any suspension or steering repair, and that calibration needs specialized equipment.
When your diagnostic tools or skill set can’t confidently identify the root cause, the cost of guessing wrong almost always exceeds the cost of a professional diagnosis. As Claude Townsend puts it: “If you don’t have the knowledge or the tools to do it, just pay the money and have a professional do it. They have insurance. They have the tools.”
Additional symptoms that warrant a shop visit soon, not eventually:
- Brake pedal feels spongy or travels too far before engaging
- Steering wheel pulls hard to one side
- Grinding noise when braking
- Transmission slipping or refusing to shift
- Any warning light that stays on after a restart
What do common car symptoms actually mean?
Reading your car’s signals correctly is half the battle. Most symptoms have a short list of likely causes, and knowing which physical checks to do first saves you from chasing the wrong system.
Engine shaking or rough idle points to a misfire in one or more cylinders. The usual suspects are worn spark plugs, a failing ignition coil, a vacuum leak, or a dirty mass airflow (MAF) sensor. A vacuum leak is particularly worth checking because it causes multiple symptoms simultaneously: rough idle, hesitation on acceleration, and reduced fuel economy, all from one cracked hose.
Brake noise breaks down by type. Squealing when you apply the brakes almost always means worn brake pads. Grinding means the pads are gone and metal is contacting the rotor. A clunking sound when braking points to a loose caliper bracket or worn suspension components. Each sound tells you something specific.
Warning lights carry different urgency levels:
- Check engine (steady): A stored fault code. Read it with a scanner; it can often wait a day or two.
- Check engine (flashing): Active misfire. Stop driving.
- Oil pressure: Stop immediately. Running with low oil pressure destroys bearings in minutes.
- Temperature: Pull over and let the engine cool before investigating.
- Battery: The charging system is failing. You have limited time before the car dies.
- Tire pressure (TPMS): Check all four tires with a gauge. Don’t trust the dashboard reading alone.
Fluid leaks under the car each have a color and location that identify the source. Oil is brown to black and usually pools under the engine. Coolant is green, orange, or pink and smells sweet. Brake fluid is clear to light yellow and appears near the wheels or under the master cylinder. Transmission fluid is red and sits toward the center of the car. Any leak under the vehicle deserves attention before it becomes a system failure.
Engine noises narrow down quickly by type. A ticking sound that changes with engine speed often means low oil or worn valve train components. A knocking sound from deep in the engine is more serious and can indicate worn rod bearings. Squealing from the belt area points to a worn serpentine belt or a failing accessory pulley.
Pro Tip: When multiple symptoms appear at the same time, look for a single root cause before treating each one separately. A lean condition from a vacuum leak explains rough idle, poor acceleration, and bad fuel economy all at once. Chasing three separate fixes wastes money.
What do automotive experts recommend for effective diagnosis in 2026?
The nine-step diagnostic roadmap published by MOTOR Magazine in 2026 reinforces what experienced technicians have practiced for years: the repair begins with verifying the customer’s complaint, not by grabbing a scan tool. Every step skipped increases the odds of a failed repair.
The core principles that separate effective diagnosis from parts-cannon troubleshooting:
- Symptom-first, scanner-second. A symptom-first approach prevents unnecessary part replacements by confirming physical evidence before interpreting codes. Codes show which system is affected; they don’t identify the failed component.
- Check Technical Service Bulletins (TSBs). Manufacturers publish TSBs when a known defect has a documented fix. Skipping this step means potentially missing a solution that already exists. Your mechanic has access to these; you can find many through the National Highway Traffic Safety Administration (NHTSA) database.
- Verify the repair, not just the code. Clearing a fault code is not a repair. The fix is confirmed only when the original symptom cannot be reproduced under the same conditions where it first appeared.
- Document everything. Recording symptom conditions, what you checked, and what you found creates a repair history that helps any future technician and helps you track whether a problem is recurring.
- Understand your vehicle’s specific configuration. Modern vehicles vary significantly even within the same model year. Engine, transmission, drivetrain configuration, and software calibration status all affect how a symptom presents and what the correct fix is.
Knowing the diagnostic process also changes how you interact with a shop. Mechanics can spot an informed owner immediately, and specific, data-backed symptom details build trust and reduce the likelihood of unnecessary repairs. Keeping your vehicle service records organized and accessible makes that conversation even more productive.
How do you diagnose transmission and clutch problems?
Drivetrain issues tend to announce themselves clearly, but the symptoms can overlap with other systems, so a methodical approach matters here too.
Transmission symptoms
Slipping gears is the most common transmission complaint. The engine revs climb but the car doesn’t accelerate proportionally. In an automatic, this often means low transmission fluid or a worn clutch pack inside the unit. Check the fluid level first: pull the dipstick with the engine warm and running (on most automatics), wipe it clean, reinsert, and read the level. Low fluid combined with a burnt smell points to overheating and internal wear.
Rough or delayed shifting in an automatic can be caused by a dirty transmission filter, low fluid, or a faulty shift solenoid. A solenoid problem usually triggers a transmission-related OBD-II code (category 7 in the code structure). Fluid that looks dark brown or smells burnt needs to be changed before further diagnosis.
Transmission fluid serves as both lubricant and hydraulic fluid for the internal clutch packs. Low levels cause increased friction, vibration, and accelerated wear. If the fluid level drops noticeably between checks, there’s a leak somewhere in the system, typically at the pan gasket, cooler lines, or front/rear seals.
Clutch symptoms (manual transmissions)
A clutch that slips under load feels like the engine revs without a corresponding increase in vehicle speed, similar to a slipping automatic but more pronounced during hard acceleration. Grab a flat, empty road and accelerate hard in third gear. If the RPMs spike without matching vehicle speed, the clutch disc is worn.
Clutch chatter is a shuddering or grabbing sensation when engaging the clutch from a stop. Common causes include oil contamination on the clutch disc, a warped pressure plate, or worn clutch disc material. This one usually requires clutch replacement.
Hard clutch pedal or a pedal that doesn’t return fully often points to a failing clutch master or slave cylinder in a hydraulic clutch system. Check the clutch fluid reservoir (usually shared with or near the brake master cylinder). Low fluid here means a leak in the hydraulic circuit.
A clunking noise when you release the clutch pedal from a stop, especially on uneven pavement, often comes from worn motor mounts or transmission mounts rather than the clutch itself. Mounts are worth inspecting before assuming the clutch needs replacement.
For a deeper look at preventive maintenance that can catch drivetrain wear before it becomes a failure, routine fluid checks and mount inspections go a long way.
Key Takeaways
A symptom-first diagnostic approach, starting with visual inspection and basic system checks before using an OBD-II scanner, prevents unnecessary part replacements and produces faster, more accurate repairs.
| Point | Details |
|---|---|
| Start with symptoms, not codes | Document what, when, and under what conditions the problem occurs before plugging in a scanner. |
| Three symptoms require immediate action | A flashing check engine light, a rising temperature gauge, and white or blue exhaust smoke all mean stop driving now. |
| Electrical issues start with fuses | Check fuses and wiring integrity before assuming a module or component has failed. |
| Multiple symptoms often share one cause | A vacuum leak can cause rough idle, hesitation, and poor fuel economy simultaneously. |
| Record symptoms on video | Audio or video of the problem gives a mechanic objective data that verbal descriptions can’t match. |
Recommended
- How to Maintain Car: Complete Guide for Vehicle Care – CarJourney Blog
- DIY Car Repairs Guide: Fix Your Car With Confidence – CarJourney Blog
- Streamline your vehicle maintenance workflow for fewer surprises – CarJourney Blog
- Types of vehicle maintenance: Essential guide for car owners – CarJourney Blog